Back to TOP
The Location
For a variety
of reasons, Old Town Mobeetie has been chosen; not the least of which is the
semi-seclusion it offers, as well as convenience to the rest of the world as we
need. It’s all of 11 miles to Wheeler,
27 to Shamrock and 35 to Pampa. Family
is close in Wheeler, and I will be working in Shamrock on a regular basis – and
not to mention the sheer affordability of property in Mobeetie and the value in
which we can build on it.
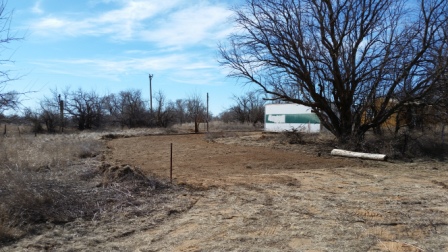
Here is a
Google Earth View of our property when we started:
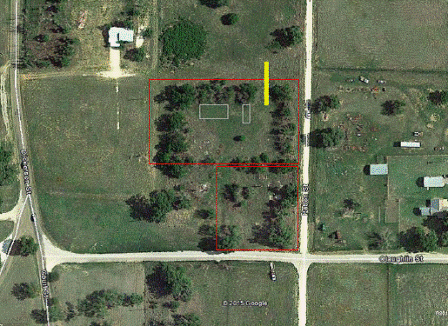
The North
Half of the area is where the house and garage are located and the driveway
enters; the SE quadrant is where the well is already in place
and where we will have a garden and maybe a greenhouse one day.
Back to TOP
The Plans
Rhonda and I have been fascinated
with the “Tiny House” movement and have watched carefully as it continues to
unfold across the nation. What we
started at The Turbo Ranch in Colorado was an overgrown version of that, and
what we are building in Mobeetie is the same idea on a bit smaller scale. The size was always about this, even in the
early plans when we were stick-building a house; so when the ready-made shell
became available it was easy to adapt our plans to fit. Including the Shop/storage and the entire
“compound” this was the first complete plan and has been the template for
things as we built it out.
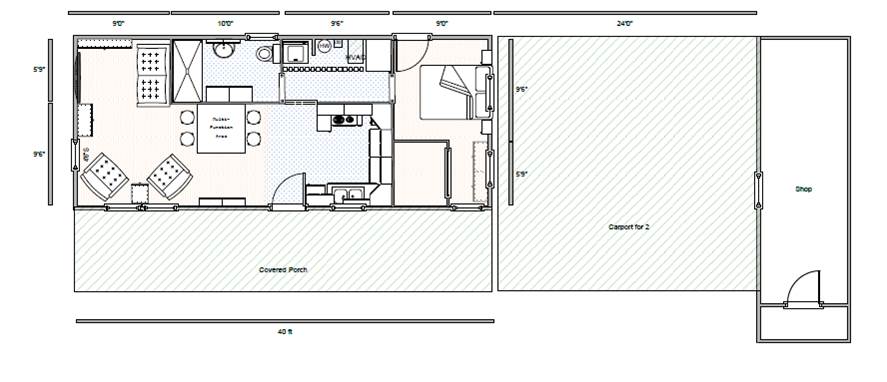
As the project moves along, I will update how it gets built out, but so far we’ve pretty much stuck to this plan.
Back to TOP
The Project
Quick Jump to Sections of The
Project
Early Preparation - House Delivery - Windows and Doors – Shop / Storage – Inside Work - – Electrical - Plumbing – Landscaping & Outdoor
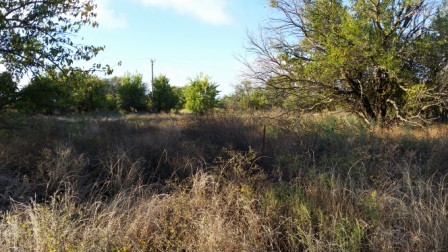
Early Preparation:
We began by
taking control over the property.
Probably 60 years have passed since old Joe
Reynolds owned and lived on the land, and from the looks of accumulated sand
and trash no one has hardly set foot on it in that length of time.
In the fall
of 2015, the weeds were from knee to waist high and more, so the use of a brush
mower (huge string weed eater on steroids with a 3HP motor) gave us some idea
of what the lay of the land was actually like.
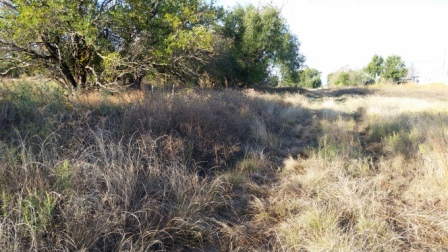
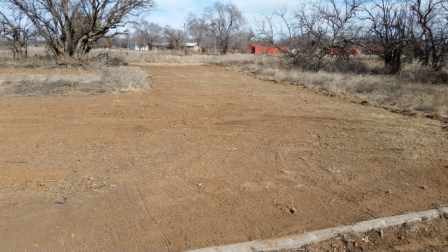
The
“driveway” started like this from the first day
And this
was looking West down Fleming Street that follows the north boundary of my
property and from which the driveway turns off of Patton.
It was sure
a mess, but the weather was nice and my brother Glen was around to help –
fortunate for me, he’s got a little Tree Trimming Business he runs so has lots
of equipment with which to help me out.
Together,
we cleared the driveway entrance…..
Then enough
space for the house…
And for a possible exit to the West of the house if needed for the delivery.
Back to The Project Section
List
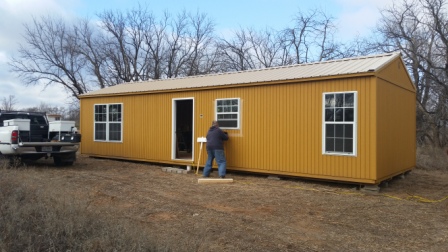
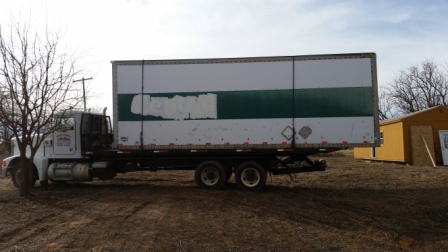
House Delivery:
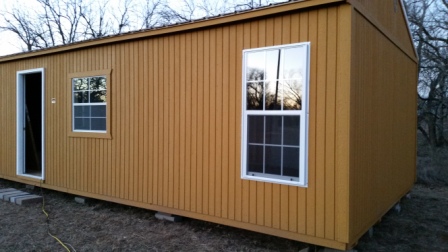
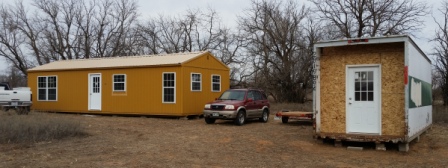
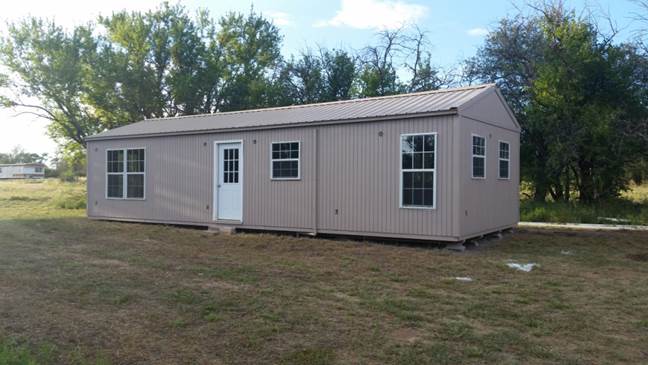
I had
purchased a GRACELAND Building as the ‘shell’ with which to work for the
house.
The funny story on that is that I bought it in
Lindale Texas at my brother John’s on a visit.
The car lot
where he helps out with body work is a Graceland dealer, so I signed a contract
through them for my house delivery – which came from the West Texas shop in
Seminole where it was actually constructed.
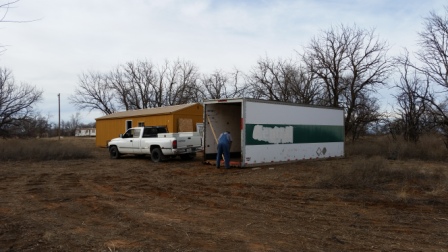
Then it was
delivered by truck…
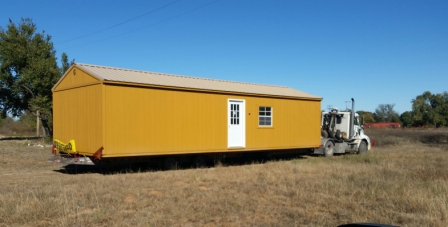
Unloaded in
the middle of Fleming Street…
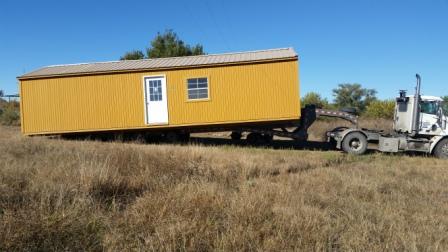
And rolled
onto my pad….
Carefully
leveled and blocked…
And in
place.
Back to The Project Section
List
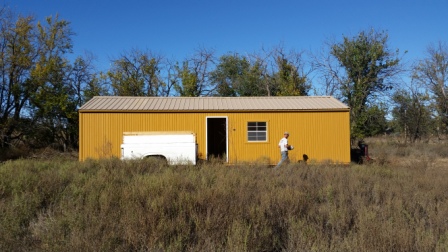
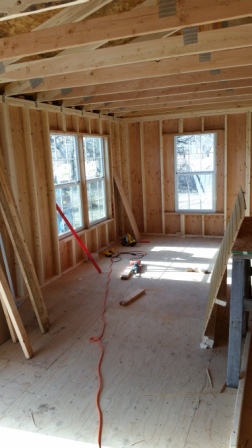
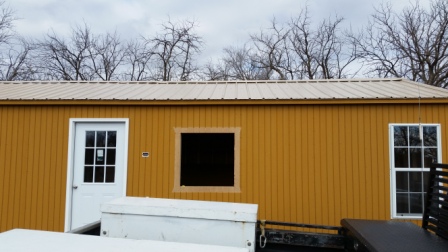
Windows and Doors!
The
Graceland shell came with one stock window and one door, placed where I has
specified.
The inside
was totally bare and an empty slate for our design.

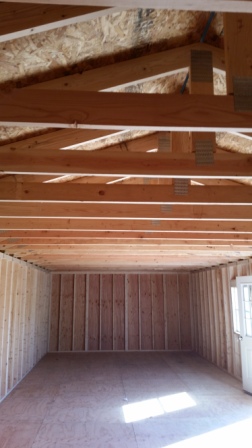
With open
2x6 rafters for construction and finishing.
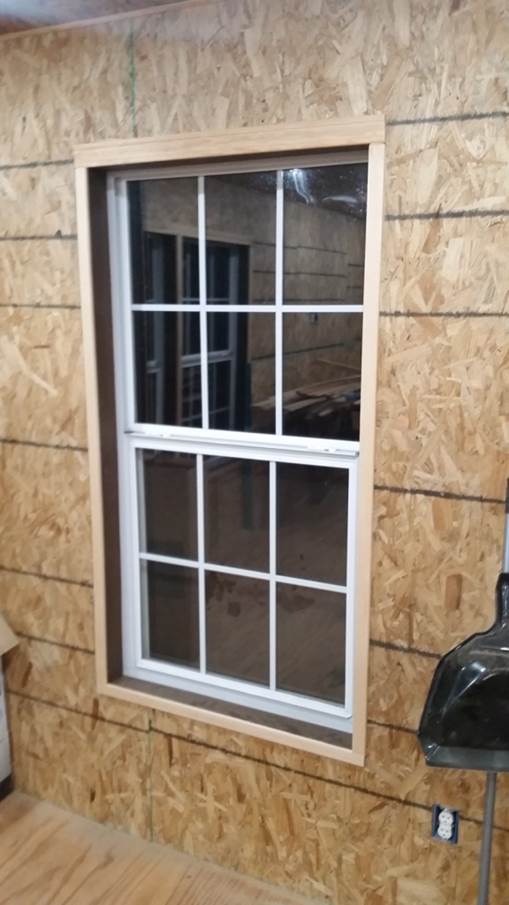
So I began
with the South window in the Bedroom
Then the
Bathroom window on the North

And the
West window in the Living Room

And then
Glen came and helped me with the double window on the South in the Living Room

Which
REALLY opened up the inside with lots of light.
The stock
window from Graceland was only single pane and was too low for the kitchen
counter,
so I got another
double pane like the rest of them and we replaced the one in the kitchen,
raising it to match the other 7 in the house.
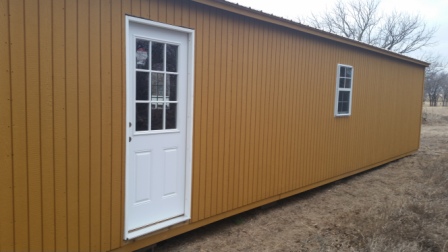
We put the
back door in on the day the Blizzard hit that night… it was COLD when we
finished it and packed up.
We finished with the two East windows in the Bedroom
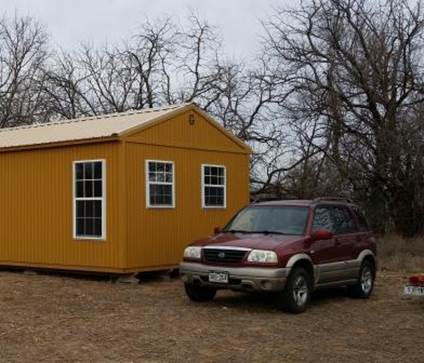
All of
which really opened up the inside of the house
Back to The Project Section List
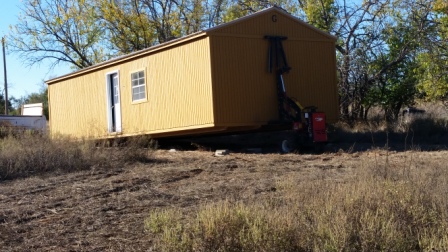
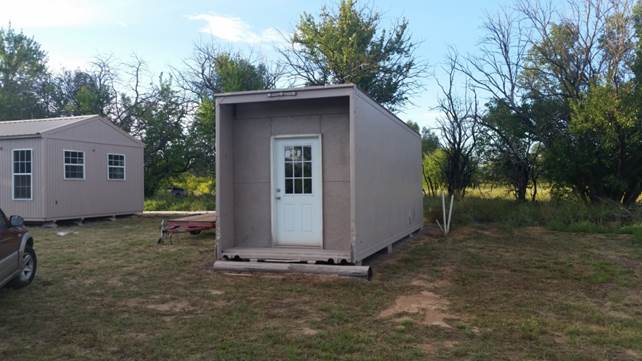
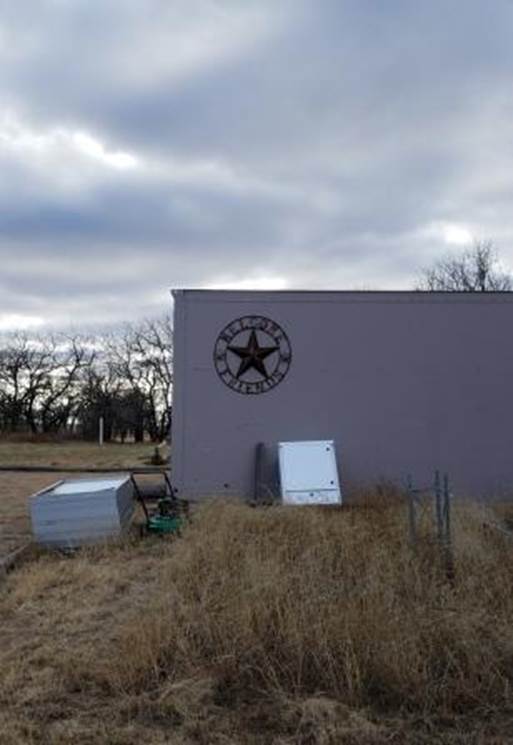
Shop/Storage:
I also have
moved in a 28’ truck box for storage and a workshop.
It was
delivered..
And leveled…
And an end
placed in it for security.

So now the
“compound” was ready for the next step.
Back to The Project Section
List
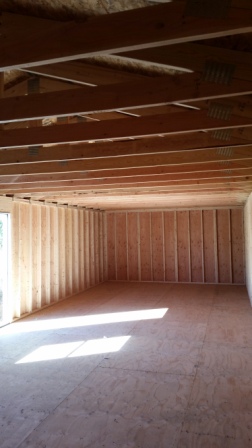
Inside Work:
Since this
project started in the fall of 2015, it was winter time in Texas.
Actually
real winter this year, with a couple rounds of snow and lots of cold weather.
A normal
person would not take on this kind of a project in that weather, but this is me
after all… LOL.
So when the
weather is nice we will work outside, and when it’s not we will work inside.
That way we
can hopefully keep things on a pretty brisk schedule for our plans to be here
full time by May 2016.
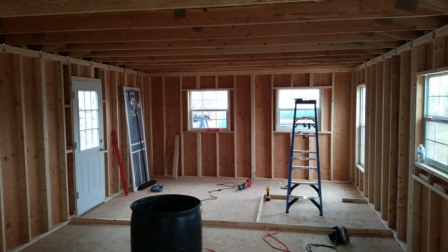
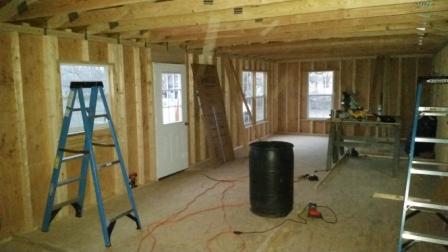
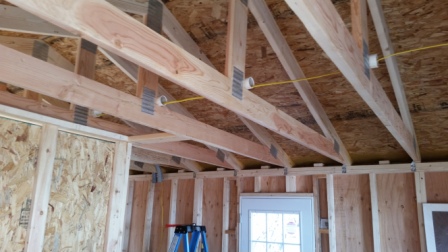
We began by
laying out footers for the walls…

Then
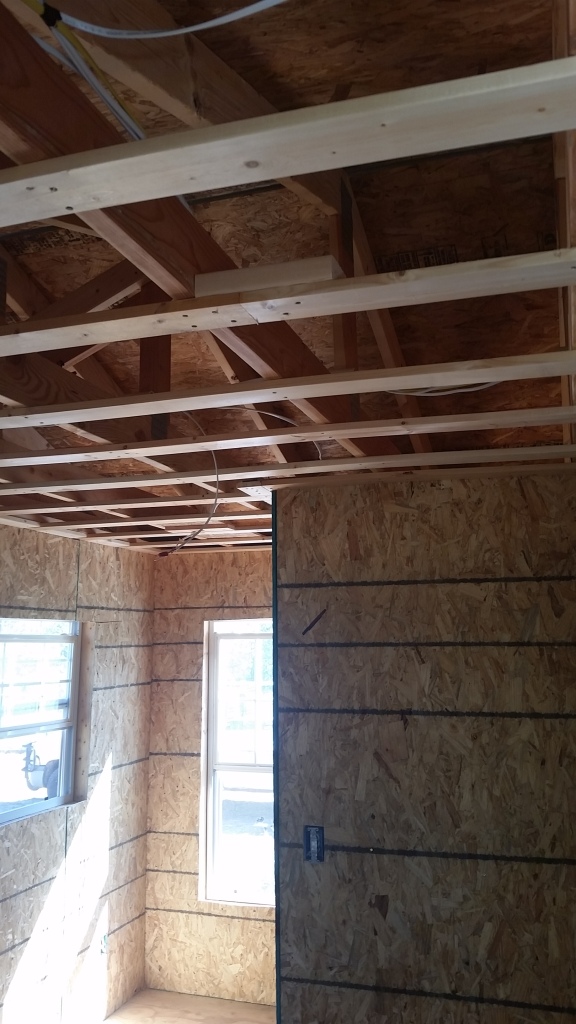
building the walls up from there…
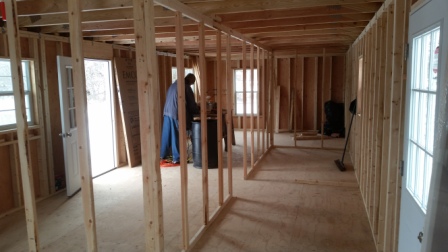
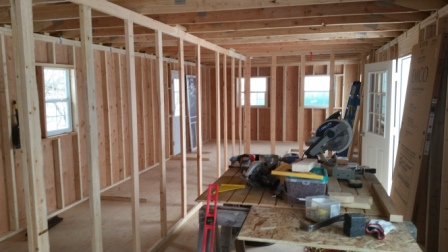
And putting
up one side of the walls (we can wire and plumb from the back).

This really
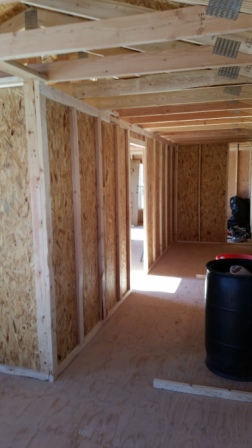
starts to give some dimension to how it will turn out.
The Project
remains at this build state inside, as we add the wiring and plumbing before we
button up everything on the walls.
**************
NOTE **************
The Project took a pause for nearly a year at this point; I was living
with my brother Glen (who was very helpful in the project) during this time,
and his wife (my sister in law, Cyndi) became very ill and we both devoted the
majority of the next 9 months to tending to her health. Sadly, she passed away from severe Carcinoma
Cancer complications in April of 2017.
Only after our family got past the tragic loss of our loved one did we
slowly begin to move on this project again.
Now in the fall of 2017, I was able to get back to focusing on this
house project and Glen has again been very helpful in getting me closer to
completion. The new goal is a New Year
in a New Home, and things are progressing to that quite amiably. Cyndi always loved to get updates on my work
at the house, and was always an encouragement on my work there. I especially miss her dearly but know she is
smiling down on my progress and is no longer in pain.
********************************
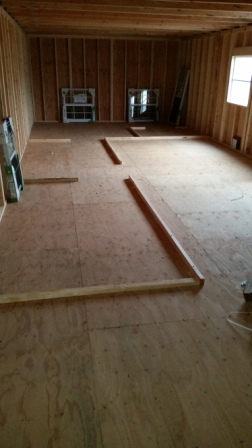
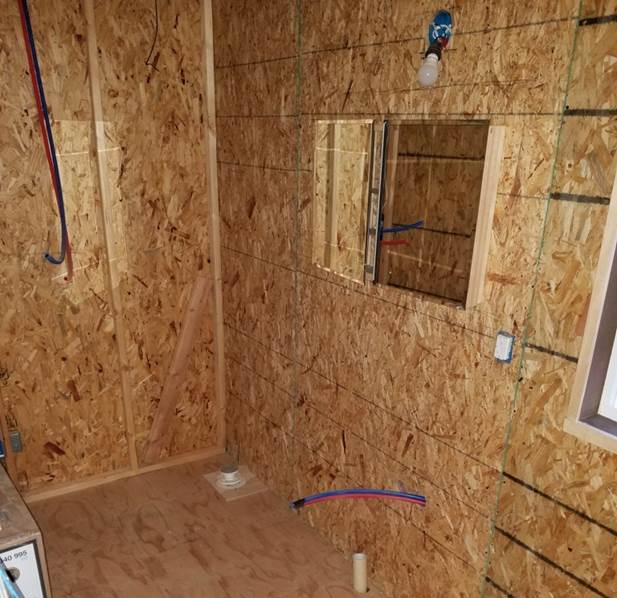
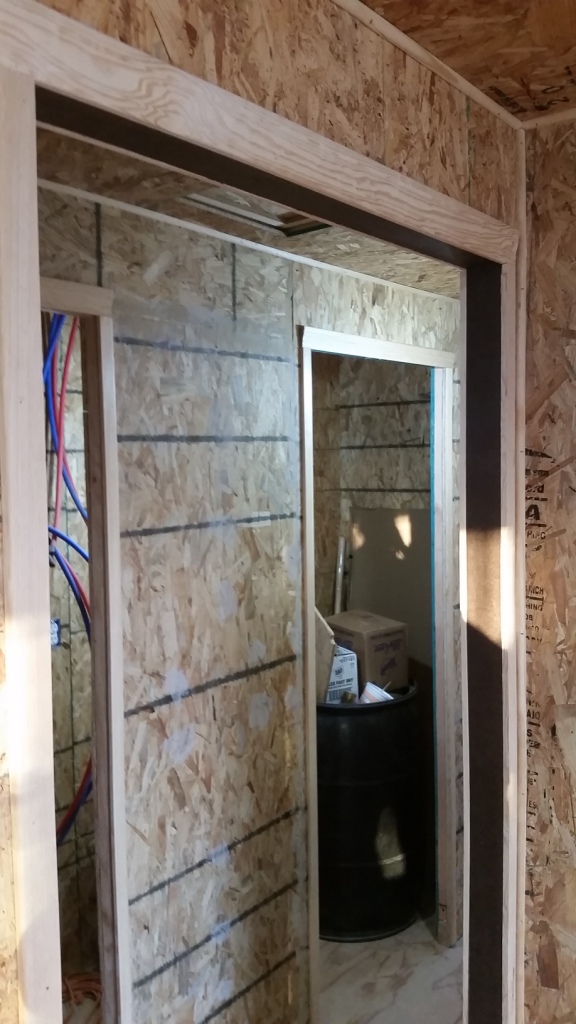
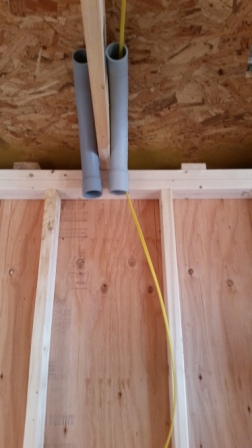
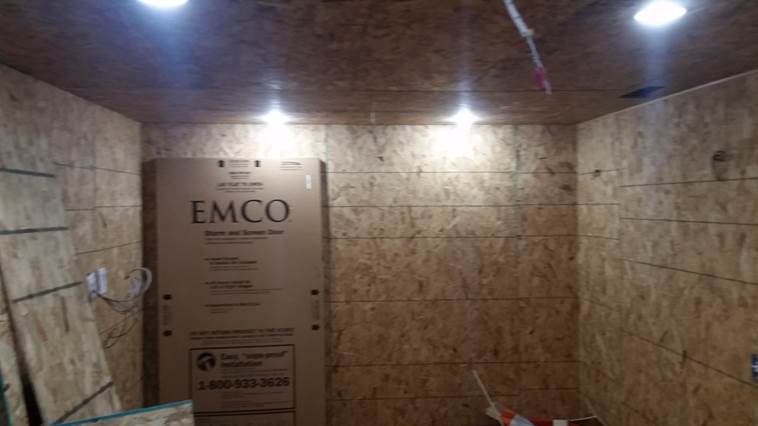
We have
started the insulation and wallboard process some

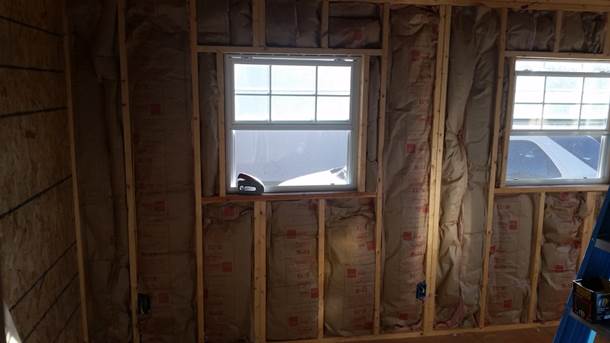

After
getting all of the electrical and plumbing roughed in and ready for completion
of the walls.
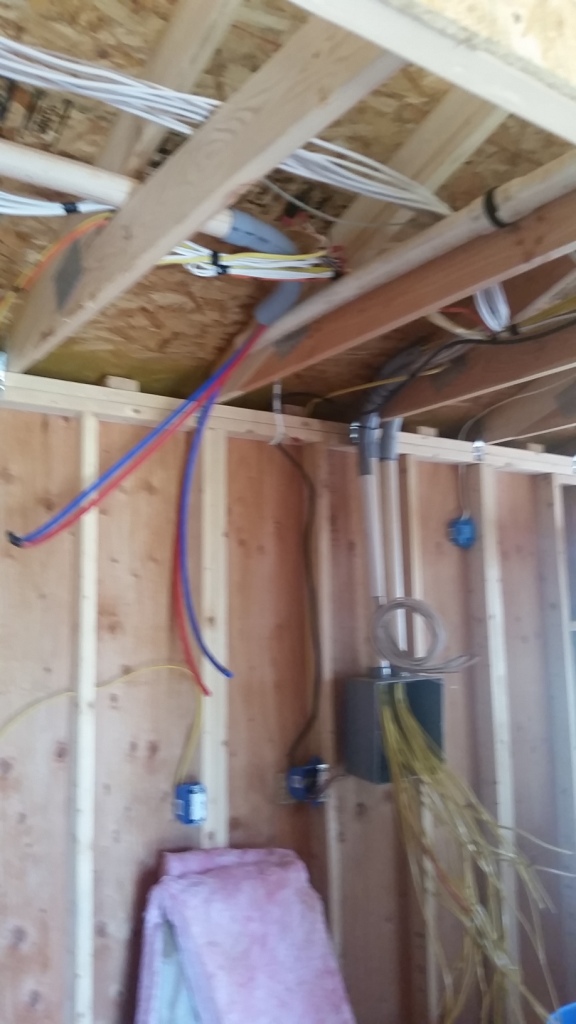
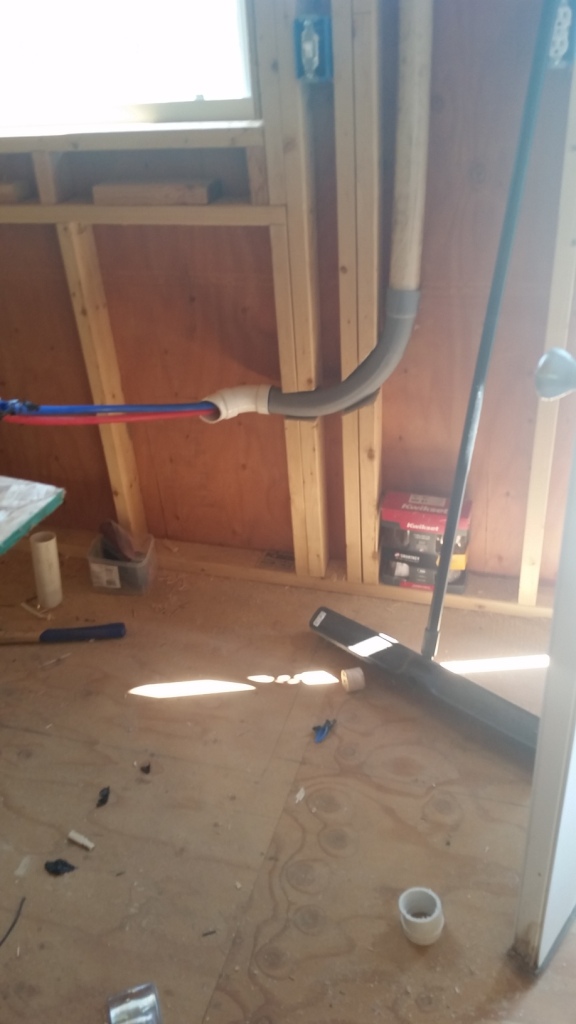
Yes, I ran
the PEX plastic water pipe inside 2 inch conduit – in the ceiling so it would
not tend to freeze, and if it did leak it would not flood the ceiling but
rather the end of the conduit instead.
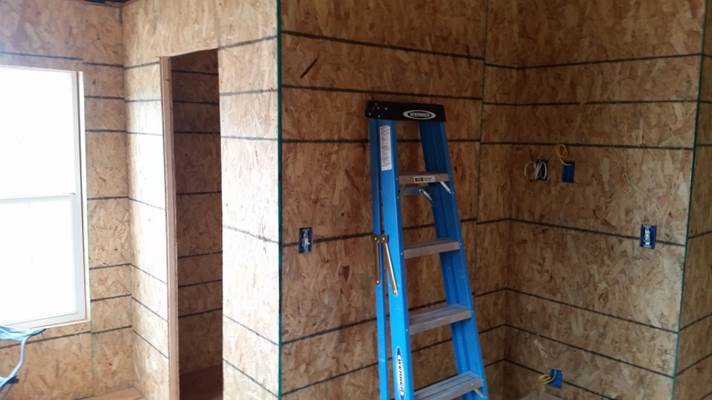
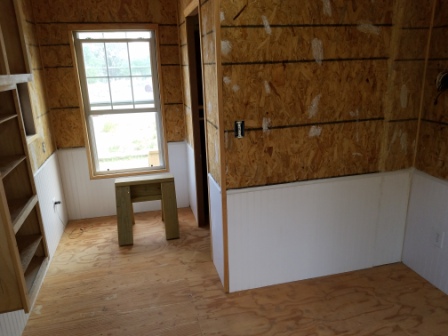
The balance of the walls were boarded and ready for finish work;
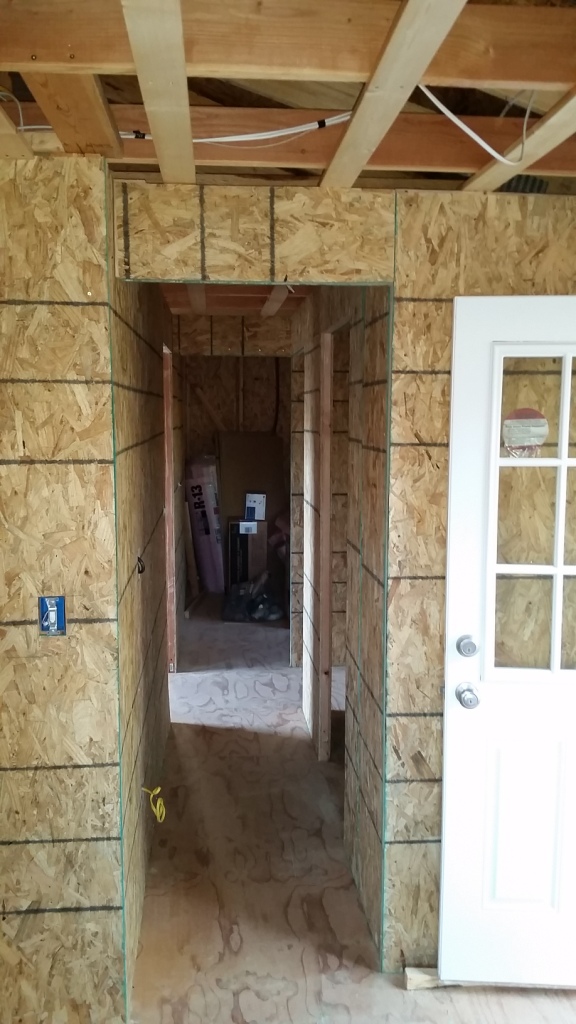
like the bedroom walk-in closet which is the back side of the kitchen;
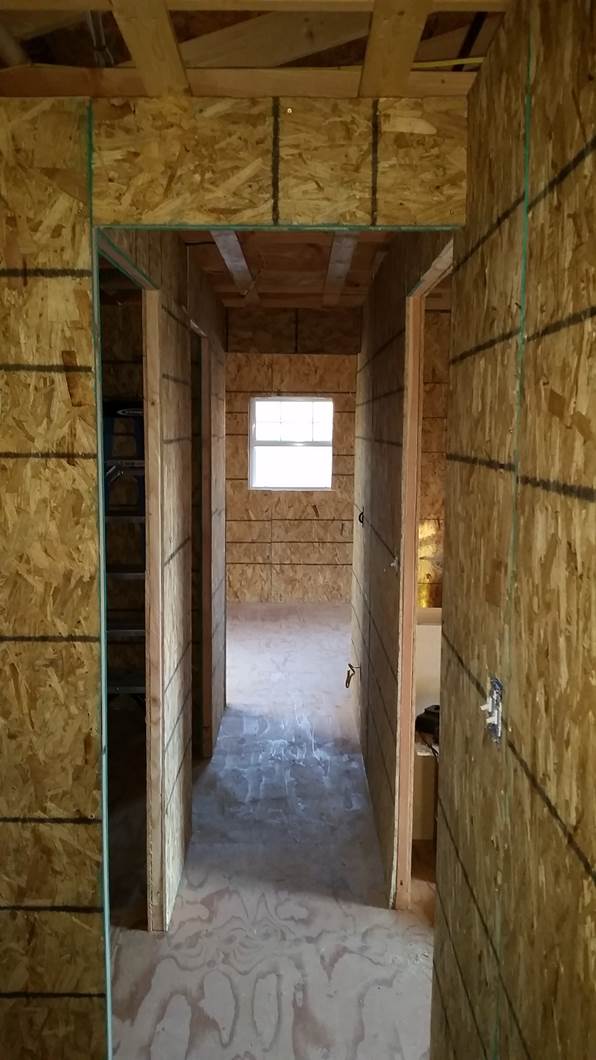
Down the
hallway from the bedroom to the bath, with the utility room on the right;
And from the
bathroom to the bedroom, with the utility room on the left:
And the
ceiling furring strips going up next.
And even the first sheet of ceiling board as well…
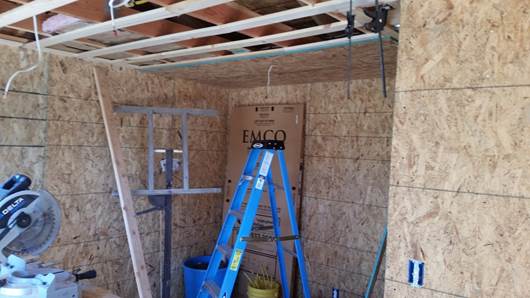
NOW we move quickly on this project as finish work inside the house will move along.
And in just one or two weekends we go to completing the entire insulation and ceiling project

Glen put the last piece of ceiling up!
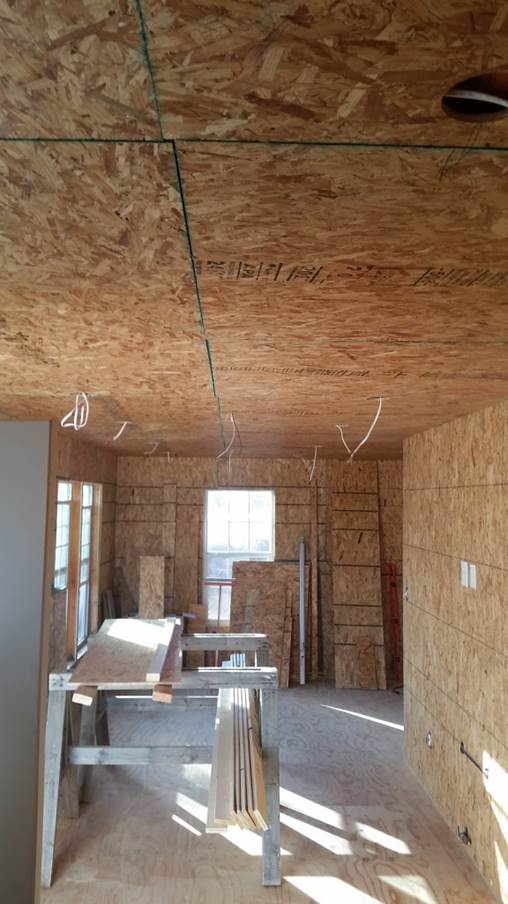
And it’s all in place for finish work

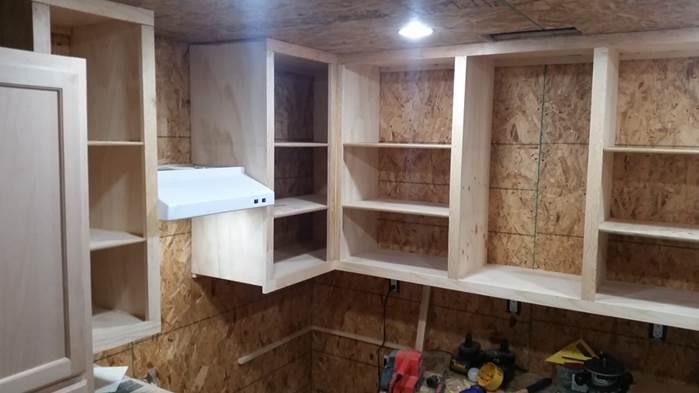
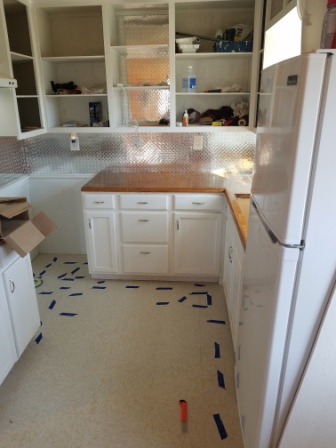
Which begins with that Kitchen design coming together
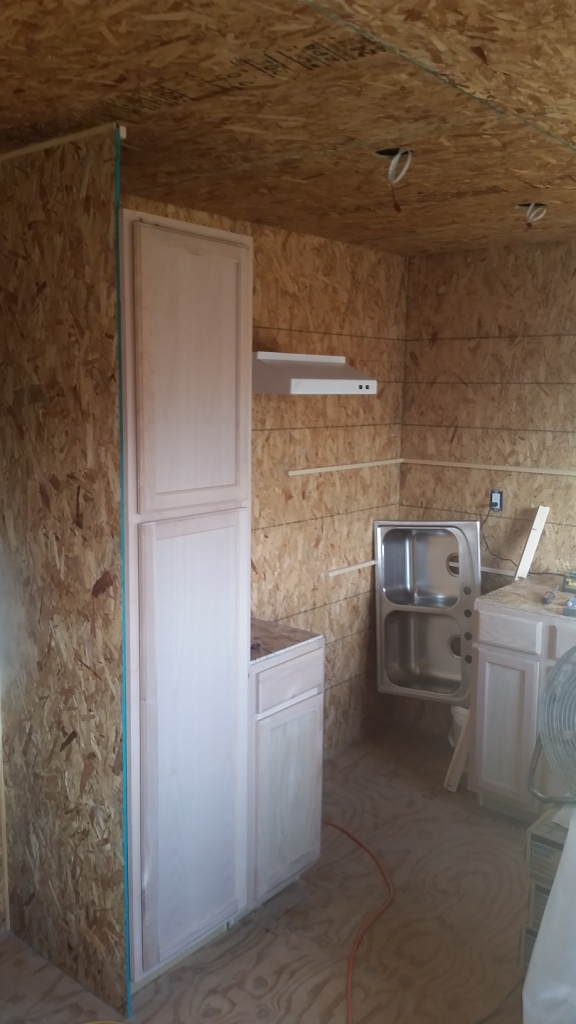
That sink is NOT going in that corner, I just took it out of the box and stored it there!
The Deep Freeze will actually go there, with a counter over it for daily use of the space.
The cook stove between it and the cabinet on the left by the pantry.
All of the base cabinets are in place, I’m custom building the top cabinets to fit the space.

… and I might as well get USE out of those cabinets already, huh?
I also have some of the wall plugs in the kitchen wired, so that’s convenient for my tools.
I used stock Base Cabinets for the kitchen, but since we want to maximize the upper cabinet space available, I decided to custom build those.
I promise you, I’ve *never* even attempted to build cabinets before, but I started building some basic boxes

And then installing Rails and Stiles and trim pieces
Until I had a complete set of cabinets ready to caulk and paint.

Note the base on the right where the refrigerator will sit, raised 8 inches to make the 23” unit feel more “normal” in height.
Also the small sliding “spice rack” to the right of the sink base was a 7 inch filler project kit that I bought online.
Building on the “success” of the Kitchen Cabinets, I
built the custom headboard-night stand set in the bedroom.
Since floor space is a premium, this not only means
the night stands do not take floor space, but also gives a lot of extra storage
options for linens, etc.
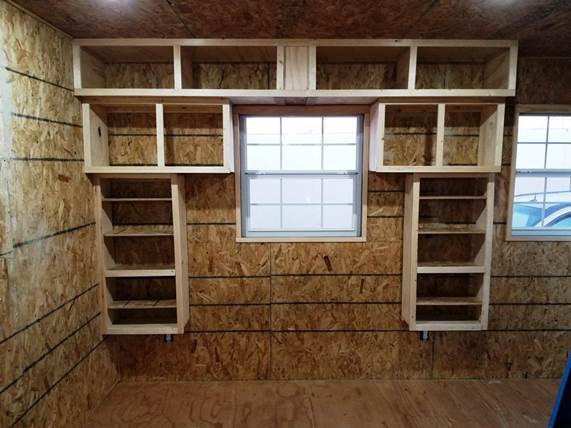
There will be doors on all of this, except the bottom
2 shelves on each side.
This is the exact size to fit my Queen size bed, with
22 inches on each side for easy access.
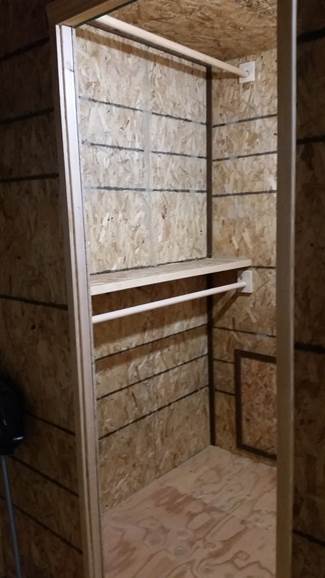
And the walk-in closet is ready for caulk and paint:
And the smallest of my cabinet projects – a custom
built medicine cabinet in the bathroom
Next I took on the project of casing the inside of the
windows and doors on the inside:
And finished the outside of the house with Window trim
as well, before the really cold December weather hit us.

BTW – all of the lighting inside and out of the house is LED. The 2 front porch lights are as well, but the globes broke in the process of installation and I’m looking for a replacement for them.
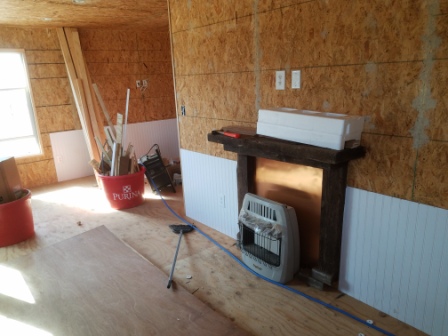
On the inside, I have also built the living room mantle and ready to mount the propane heater.
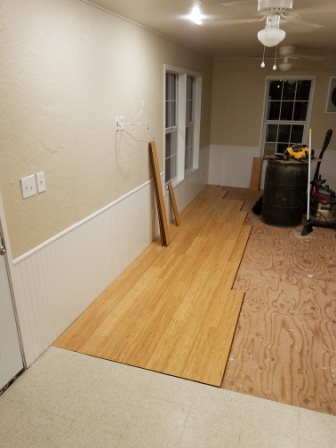
Wainscot will go up in the house next, then wall and ceiling texture and paint…
Really, once you get to this point, it is just the *details* of trim , paint, etc to make it look like a home.
That process looked like this:

Then some primer and paint

And the flooring goes down in all places


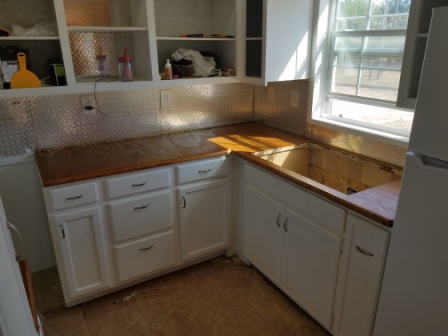
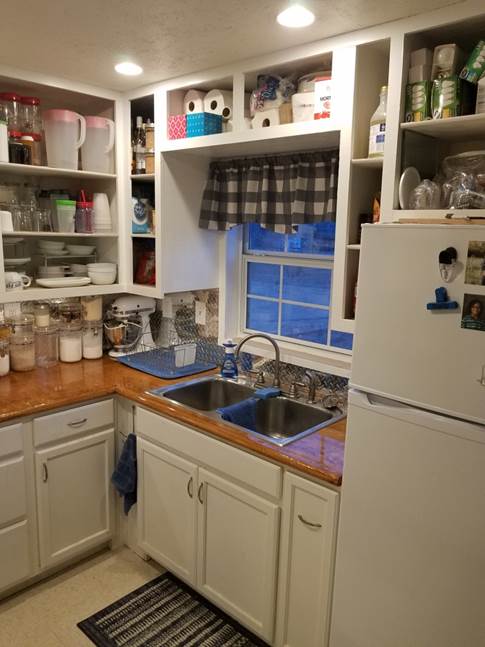
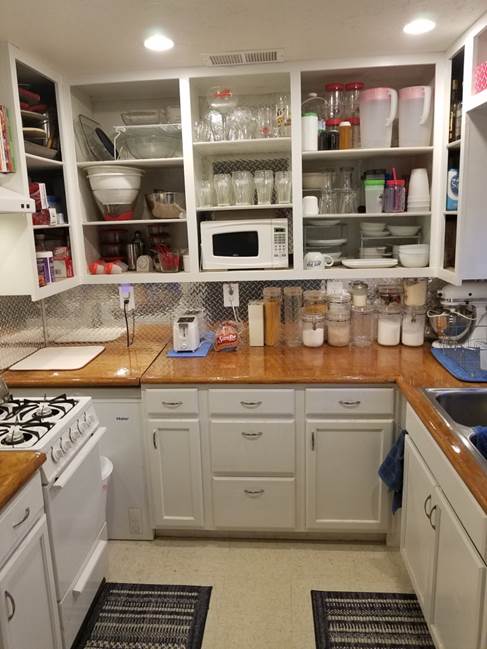
And then the finish work in the KITCHEN
With that hand-made counter top and finishing.
Back to The Project Section List
Electrical:
The
electrical has to start with service, none of which has existed on this
property in the last 60 years.
So Excel
Energy will have to put transformers on a pole (which do run through the middle
of my property) and connect to a service pole which I must provide.
Brother
Glen had a nice utility pole 24’ long which fit the bill, so the next challenge
was to dig a 6’ deep hole in which to put it.
By hand..
Through the
blessing of good neighbors, we borrowed a nice little Kubota tractor with a 36”
box on front that allowed us to dig a 3’ deep hole in which to dig another 3’
deep hole by hand.
Then using the
front bucket we pushed the pole up into place and tamped the dirt around it.

Of course,
this would have been next to impossible without the extra set of hands from
Brother Glen.
Making a
very nice looking service pole, if I may say so myself.
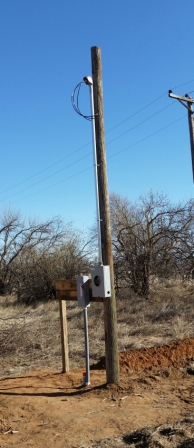
That is now
complete with the disconnect to the underground
conduit.
-Now the
inside details start, which will have little to actually show for!
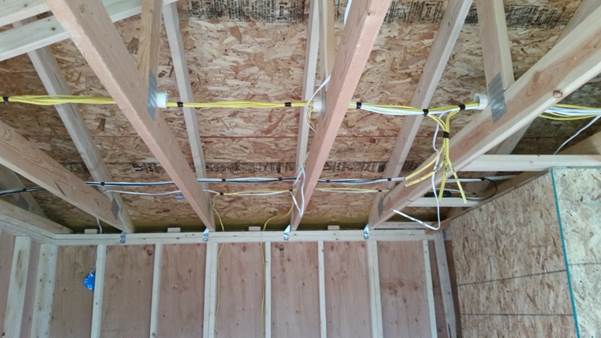
I have cut
some 2” PVC into rings to keep the wires straight in the attic as I go –
being that Radio
Engineer who likes nice wire bundles, this only made sense to me.

They run
the entire length of the house

And all
terminate with sweeps out of the attic to my electrical box on the back wall of
the utility room.
It’s
beginning to look a lot like… WIRE.. and about ready to
button it all up into a junction box.
Another
aspect of “wiring” is my A/V wiring – I have CAT5 and RG6 run to several location
In the
house and all of that also now comes here for cross-connection as well.

About
everything I can think I will ever need is wired –
I hate crawling up in an attic later to add a
wire I may have forgotten!
This is all
now getting covered up with ceiling boards, with a layer of insulation going in
just before that happens.
And on an
afternoon I installed the 16 can lights and got LIGHT in the house for the
first time

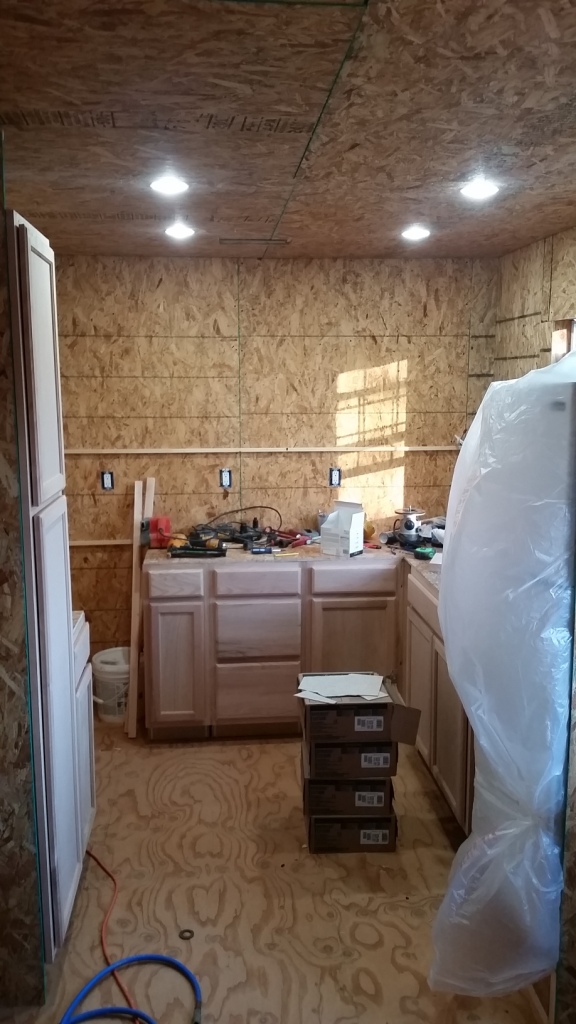
– while I have not got to flip all 14 of those light switches
just yet, it’s getting close!
The
underground lines from the utility pole are to the shop and ready for inside
work there.
This is
primary AC from Excel, a conduit for satellite / telephone / internet, and a
run for power for the well and outside needs.

At the
other end, they are all buttoned up and pretty much in their finished state.

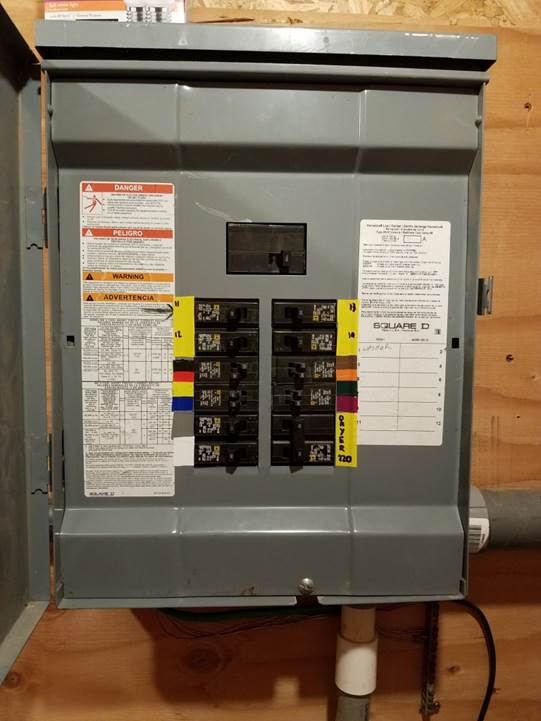
In the
shop, we have completed the walls and installed the Generator Transfer Switch
And Breaker
Boxes for both the Shop and the House
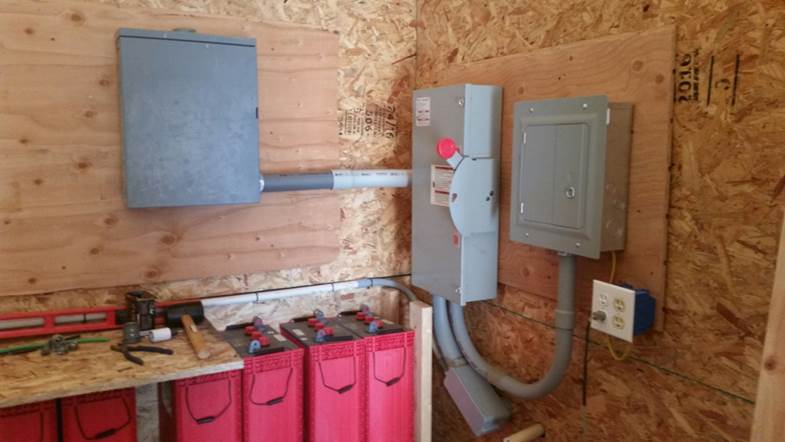
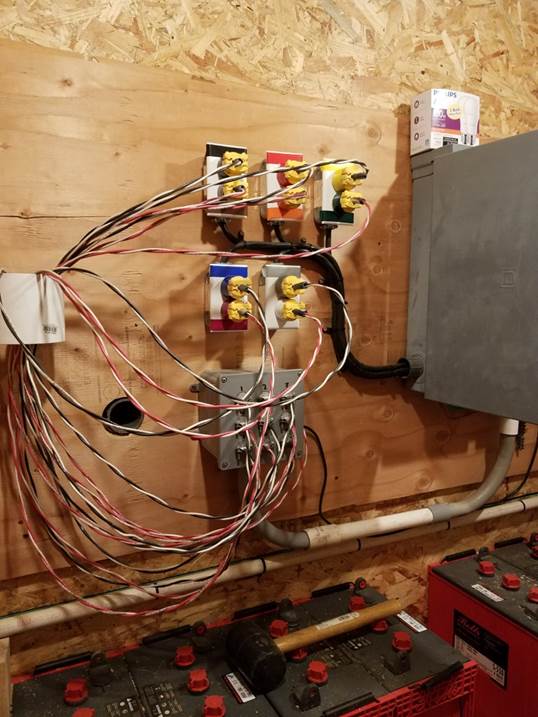
Ad you can
see, the battery rack in complete and was put in place early and everything
built around it.

Those 16
batteries weigh 125 pounds each, for a total of over 2,000 pounds with that
rack.
We have
also completed the “utility room” by building the walls and ready for a door.
This will
let me keep just that area warm this winter with a small heater, keeping the
batteries from freezing.
It’s the
back 5ft of the shop, which is pretty full of house stuff awaiting use right
now.
As we move
toward finishing this utility room, things will start happening quickly.
Some photos
as we go along, just to chart the progress.
Here I have
the house breaker box wired to my external connections, where I can switch between
Commercial Power
And battery
backup by just moving a jumper cord.
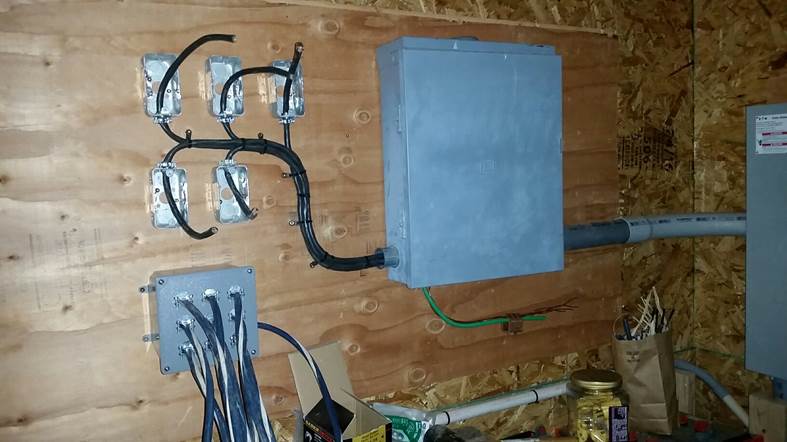
This was my
first afternoon of working on this part of the project.
The
junction box on the wall with the 10 cords coming out of it,
is the tie to the lines running into the house for those 10 circuits.
There are 6
more circuits to the house not on the “inverter” wiring, like the washer,
dryer, and stand-by heating.
It now has
the wiring complete after the main bundle of wires was run to the house:
And color
coding inside the breaker box for the 10 circuits to the house.
And the junction in the house to all of those wires already run!
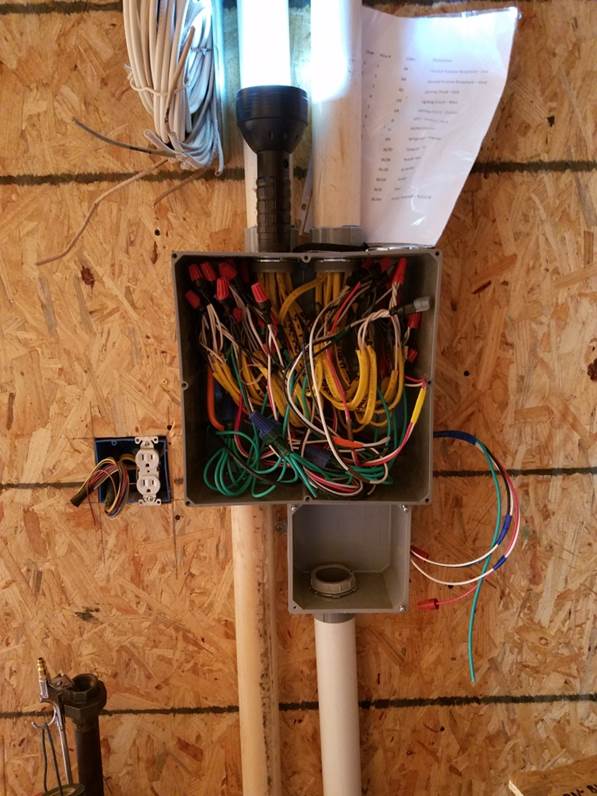
The pair on
the right are now in conduit and a pair of stand by
heat receptacles.
The smaller
empty box with conduit from the floor is for coax and telco wiring, that’s in
the shop but not extended to the house just yet.
We will
have a WISP for internet and satellite for TV, all of which will be managed in
the shop.
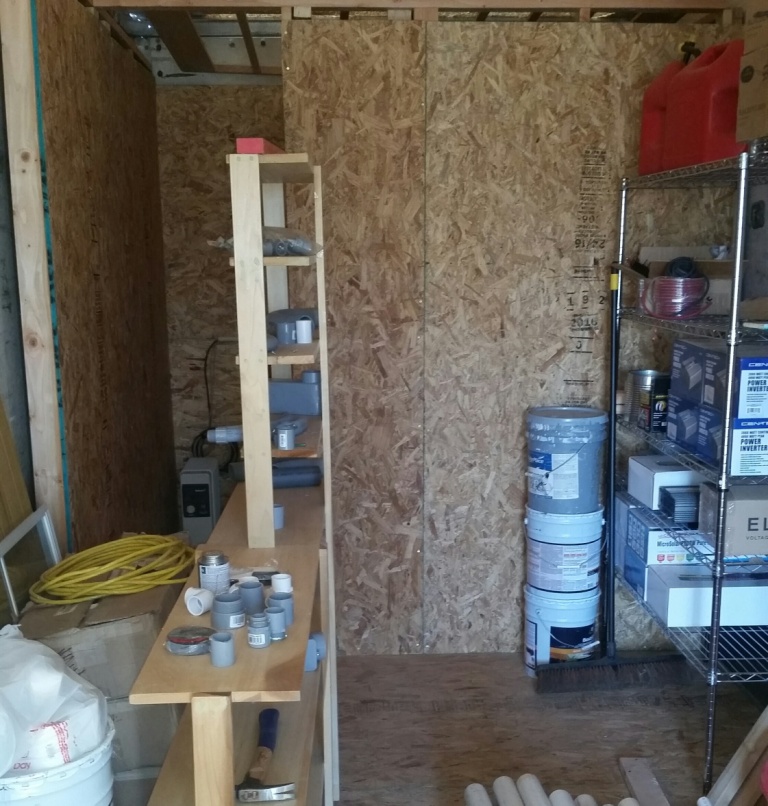
This
utility room is now finished out with inverters, charge controllers, monitors,
and such a mess it’s difficult to even photograph!
To
facilitate both the Internet install as well as the power, I got the Windmill
Tower UP!

Off loaded
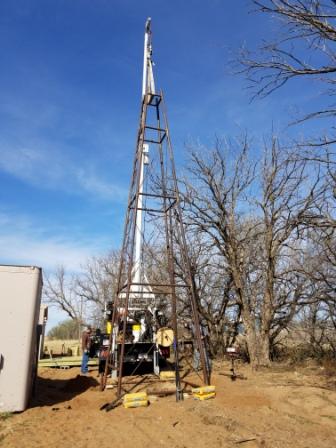
Stood Up

Anchored
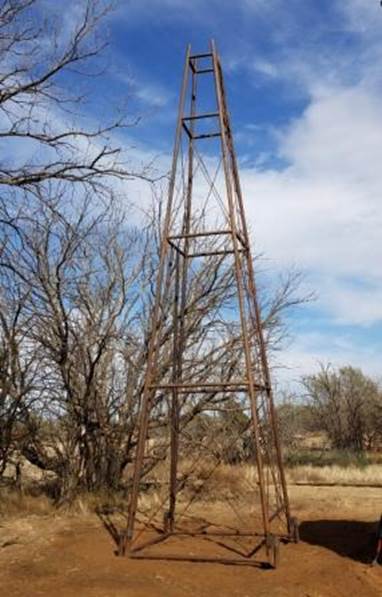
And
Completed to that point.
Later it
got a top hat and is a daily work horse for us.

And with
the wind turbines up on the tower, I spent a weekend and completely set up the
first of the solar arrays.

On a bright
sunshine day, with good winds (not hard to come by here!) I can make
5kw an hour, which will charge the entire battery system in about 5 hours.
Back to The Project Section
List
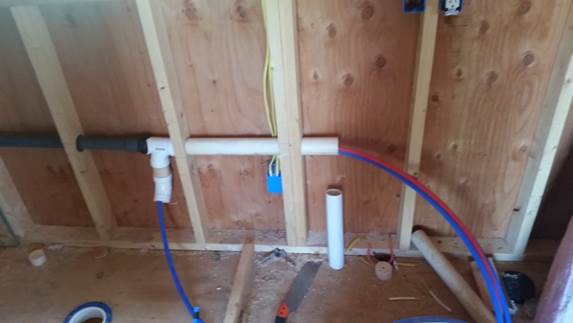
Plumbing:
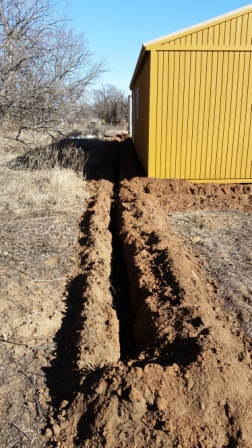
Plumbing had
to start outside as well, where it will all come from and finish, as there are
zero utilities available on the lot.
I have to
install a septic system and water for supply.
We rented a
ditching machine when it was a sunny weekend, and dug about 200’ of 3’ deep
ditch for these purposes.
The main
one from the utility pole to the shop was 85’, and carries the water lines from
the well and electrical conduits from the pole.
Also one
across the back of the house and shop will carry water supply, electrical from
the shop to the house,
propane
from the tank to the house, as well as sewer to the septic tank.
And from
the kitchen around the house to the septic as well.
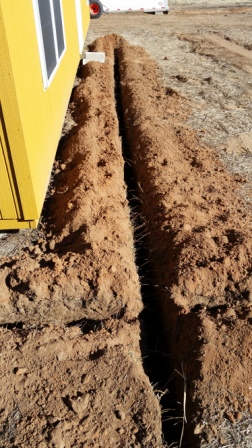
That run
from the kitchen is the first to penetrate the house… we’re on a roll.
It is now
complete to the septic line in the back.

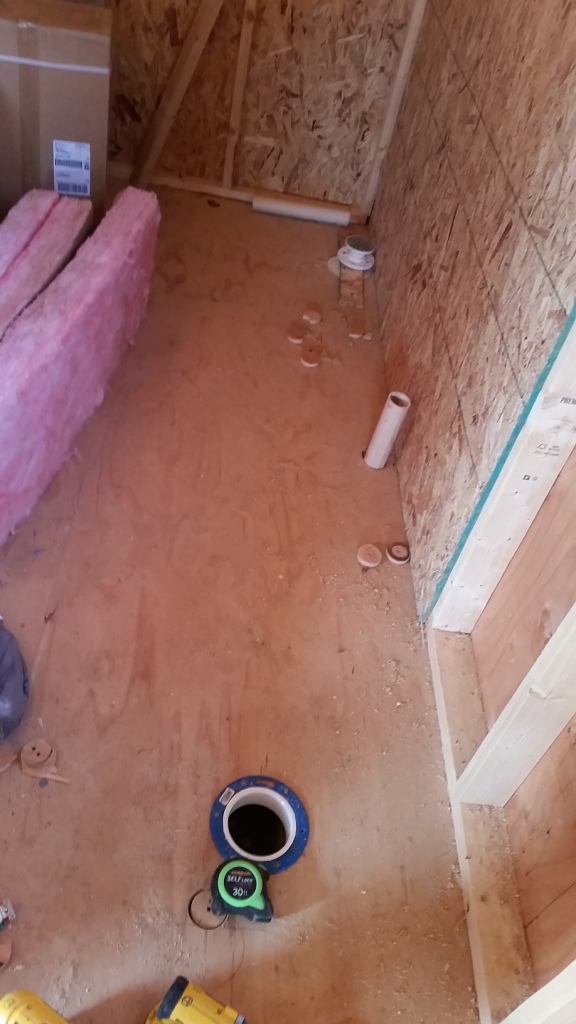
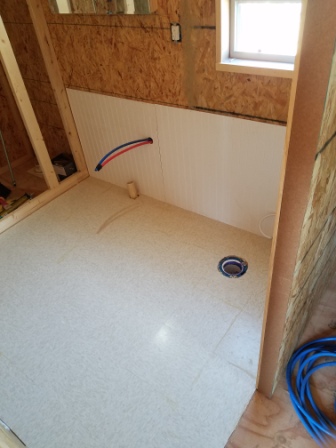
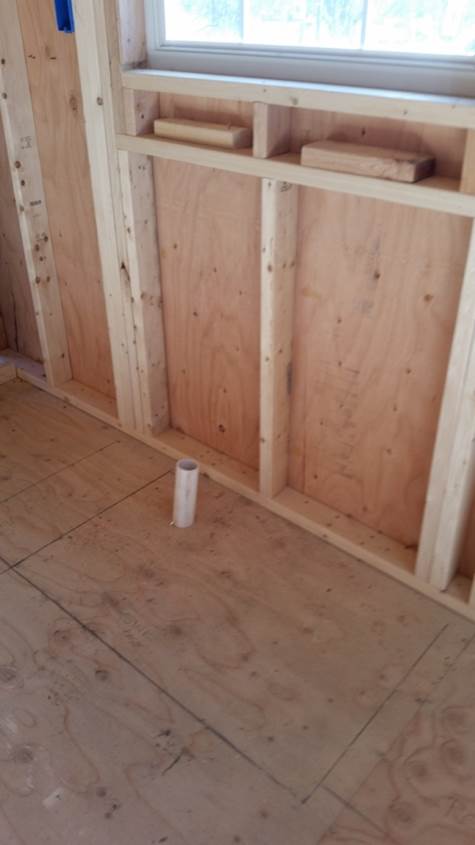
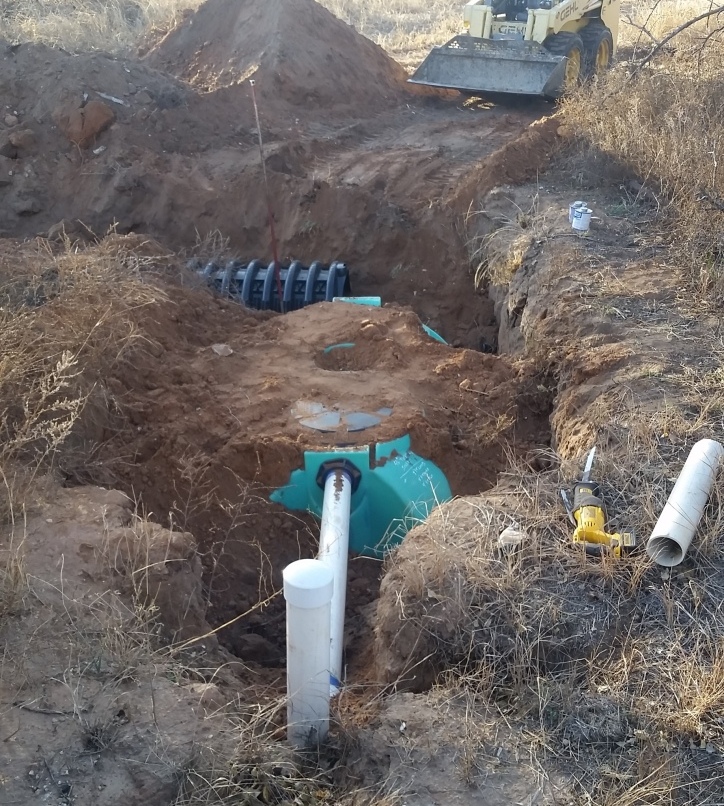
Inside, the rough in drains for the shower, lavatory and stool and laundry are in the floors before walls and supply lines are completed.
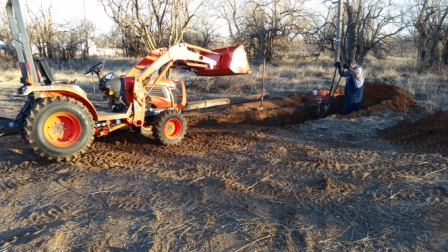
Speaking of
which, the septic tank has been dug and is being prepped for install.
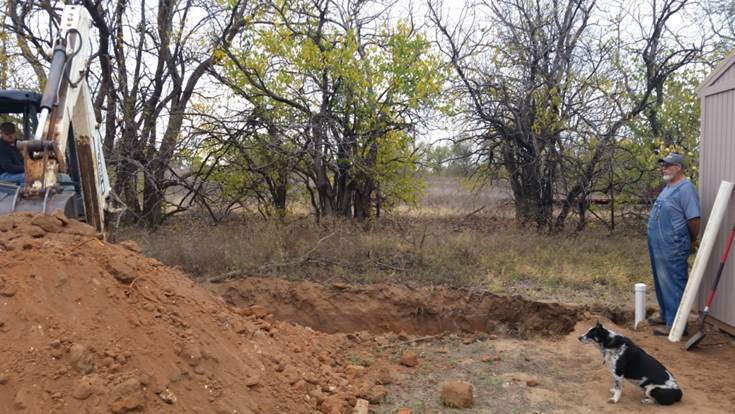
Using the
BIO DOME system for a leach field instead of the traditional perforated pipe
system with gravel.

And as the
song says “we get by with a little help from our friends” – or more accurately
our neighbors who have the right size tools to get a job done.
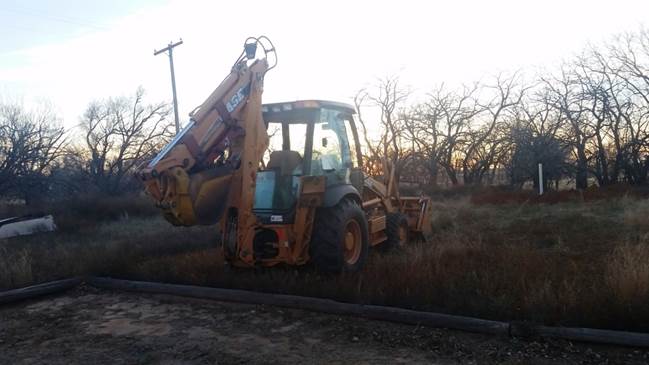
Having
access to both big and little stuff
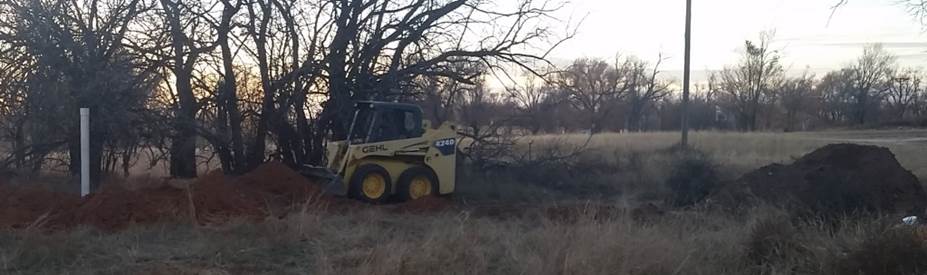
Made a
really quick job of the dirt work needed for finishing the install of the
septic system.
Tank in the
ground

And
bio-dome leach field installed.
After
planning on this project for so long, it took an afternoon to complete!!

That vent
at the end of the buried Bio-dome will be trimmed to a manageable height before
long as well..
You also
have to know that in these rural areas out West, our “neighbors” are those who
live “close”… this young man and his little family are about 6 or 7 miles away,
but we all call the same place “home” so that is close enough to count in our
books. We all extend helping hands to
each other any time the need arises, and I have been welcomed to this community
with nothing but open arms and continual offers to be of assistance in any way
that may be needed. I truly am blessed
to be able to spend the sunset years of my life among those who really embody
the spirit of what America is all about, and around which I was raised 6
decades ago in little Chillicothe, TX.
SO – We
have drain, we need SUPPLY.
It’s time
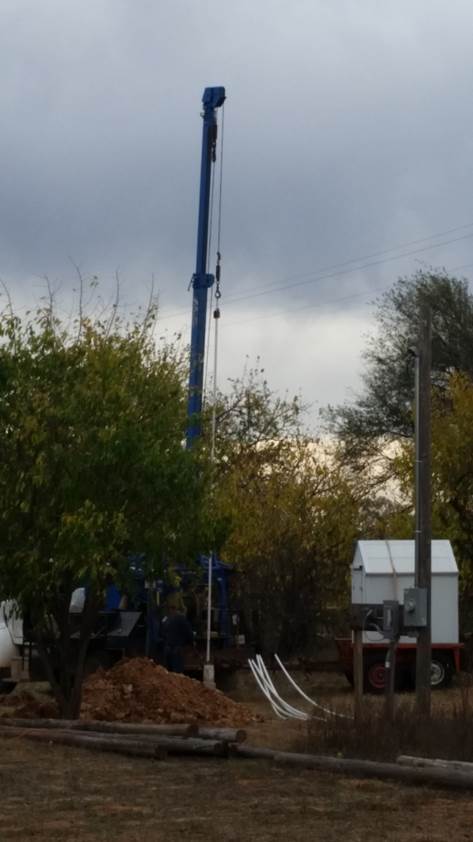
for new water well.
An exciting
couple of days as they came and dug for me
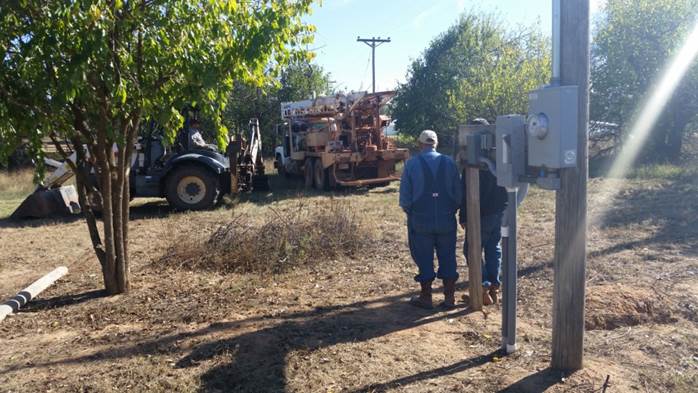
… and finished up late the first day.

Checking
Static Water level… was at about 50 ft that first day, a little higher as it
settled in a few days later.

Second day
of well work was the pump install and well house placement.
The pump is at 120 ft, so only a ½ horsepower model is needed.

Lines from
the well house, and power to it all trenched and connected.
A yard
hydrant will go at the corner there.

A nice
clean well house, with 90 gallon fiberglass pressure tank.
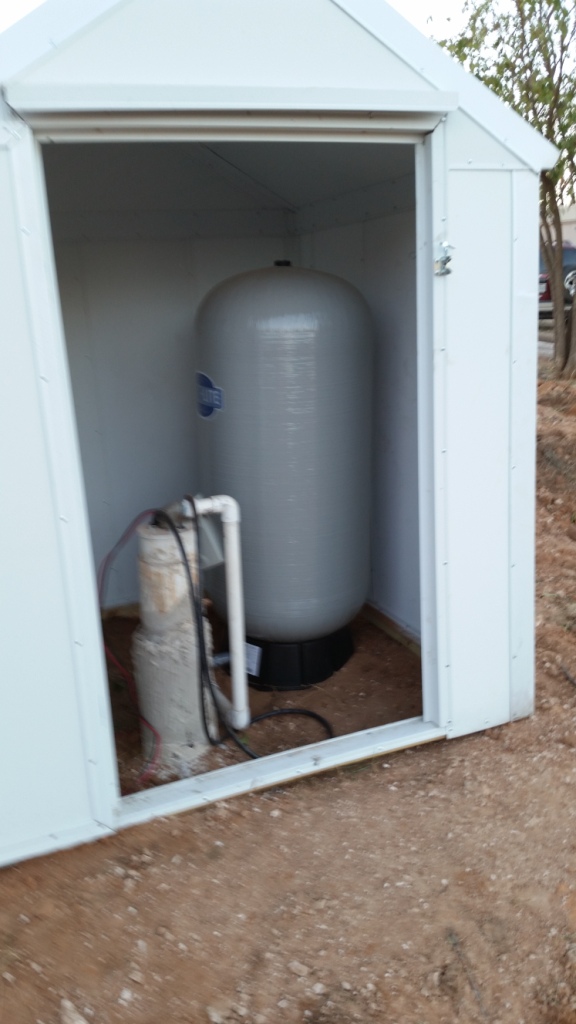
All Finished out with rock floor and all the electrical and
plumbing manifold complete… Ready to turn on the power and
pump water.
And at this
juncture, those two 1” pipes were complete all the way into the Shop
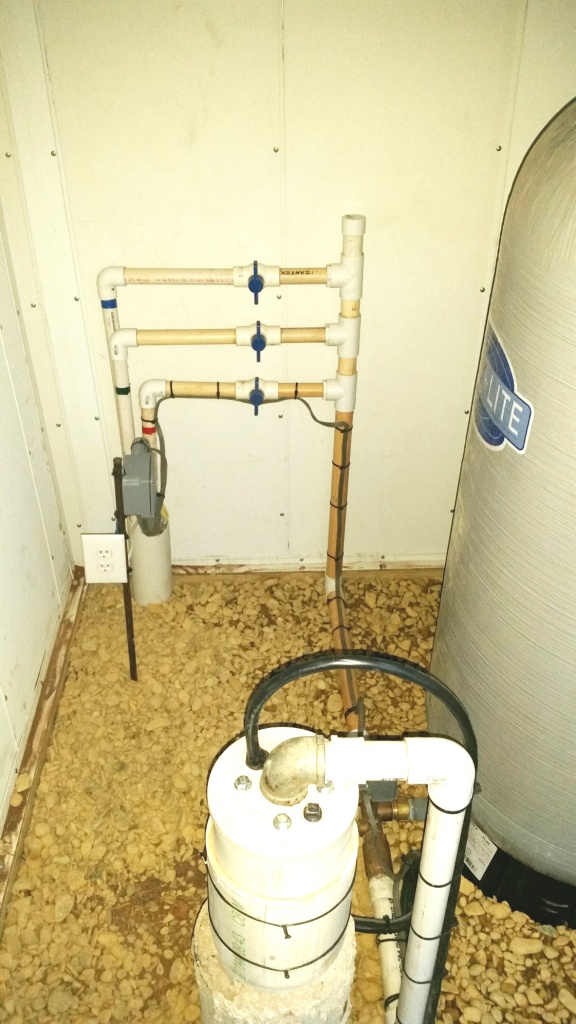
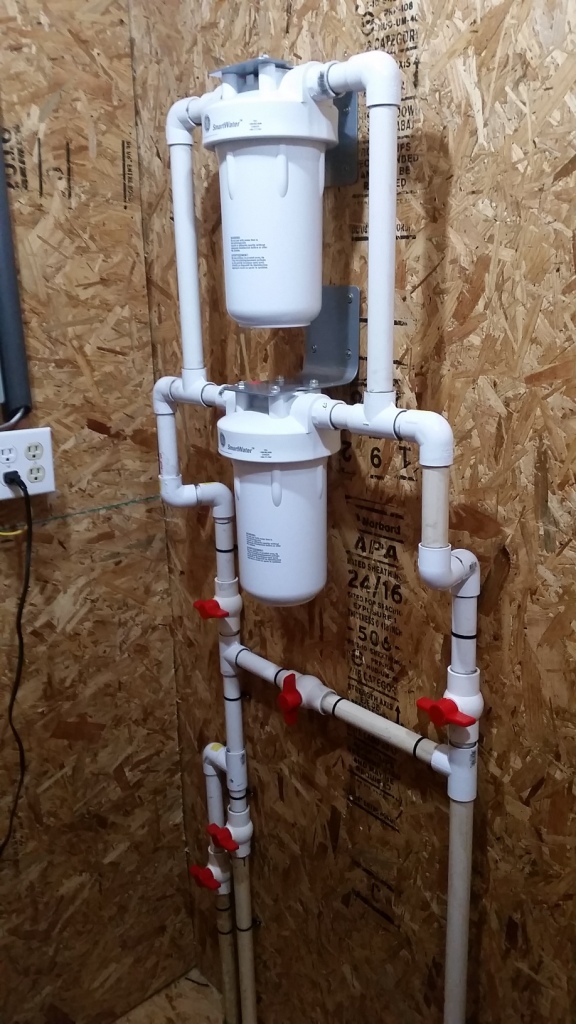
ready for my water filter system hookup.

This gets
finished after the wall went up in the utility room, and the water filtration
system has been installed.
I have an
outside hydrant in the south part of the front yard, as well as one in the
middle of the north part of the back yard.
And I am
the proud owner of 150 ft of some really great ¾”
water hose that can reach anywhere I need on the entire plot.
All of this
is now fully functional and I’m appreciating both the front and rear hydrants –
the water is REALLY good!
Another
aspect of “plumbing” because it involves “pipes” is my propane system.
I already
have on hand a propane wall mounted stove for heating the living room, a
propane cookstove and a pair of propane water
heaters.
I found a
couple of propane tanks at auctions and moved them on site, leveled and ready
to connect to the house and shop.
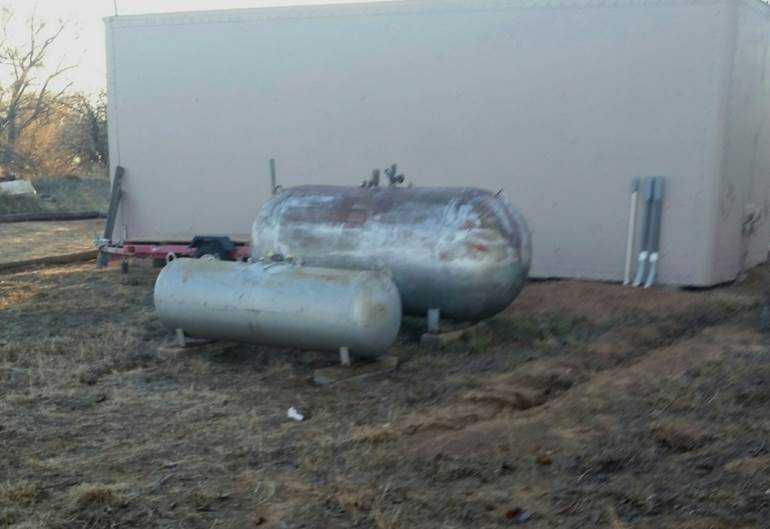
The trench
is already done and the 1-inch main pipe is now in the house and ready to
connect to the internal appliances.
This
includes a cook stove in the kitchen, a wall heater in the living room, and 2
on-demand water heaters.
Back to The Project Section
List
Landscaping & Outdoors:
This is a
lot of square footage, and I intend to use as much of it for something other
than a yard as possible.
To that
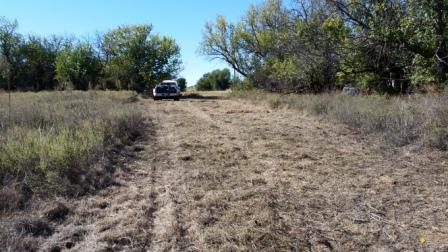
end, I’m making a large driveway and turnaround area which we will cover with
rock in the future.
Using the
Kubota tractor, I had the chance to smooth out that area and even put some old
utility poles down as curbing.
The view
down the driveway toward Flemming Street
And my
driveway entrance.
Compared to
the beginning, this is a huge step and is shaping up just as I had hoped.
As winter
turned to spring, and then to summer – I got busy building a radio station
project and let things slide a bit on the house.
During that
time, I realized how much we disliked that color on the house, and that NOW was
the time to change that, instead of later
So it got a
nice primer coat and new color over everything, including the shop.
The
driveway is now contoured and ready for rock surface delivery.

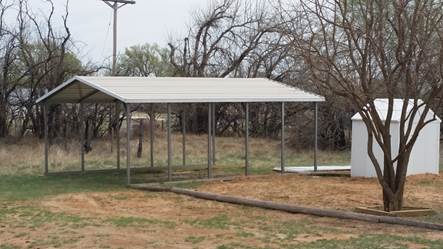
As a side
project that was contracted, I had a car port built next to the well
house. The main 2-car spot between the
house and the shop will be covered in the next phase (after we get the house
livable) and be the main parking space. But having more than 2 vehicles, as
well as an ATV and a tractor, the extra space will sure come in handy.
The 2-car
size carport came as a kit, delivered and assembled on site:

And will
come in handy for those hot West Texas summer days, I’m certain.
As the months
and years rolled on – more got added to this outdoor scenery
, mainly my Solar Array.
Which I can not find any pictures of the construction of it – I
literally put it together in about 2 afternoons and the spent 2 week wring it
up for use.
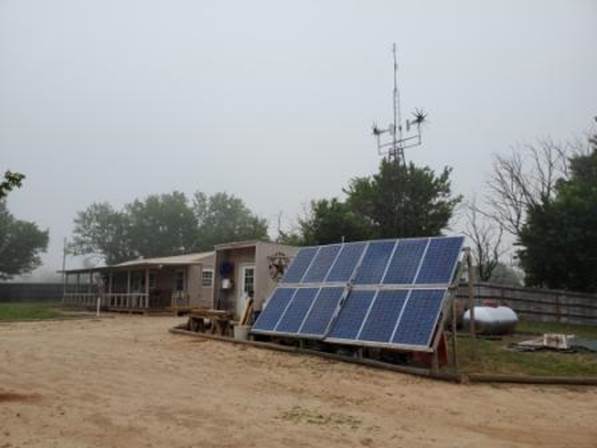
I also
mounted the first pair of Wind Turbines on the tower and spent time wiring them
up as well, giving a new look to the compound from the driveway.
(You can see
this is not all in chronological order)
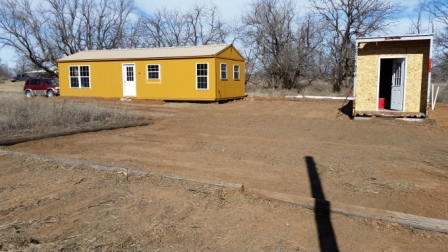
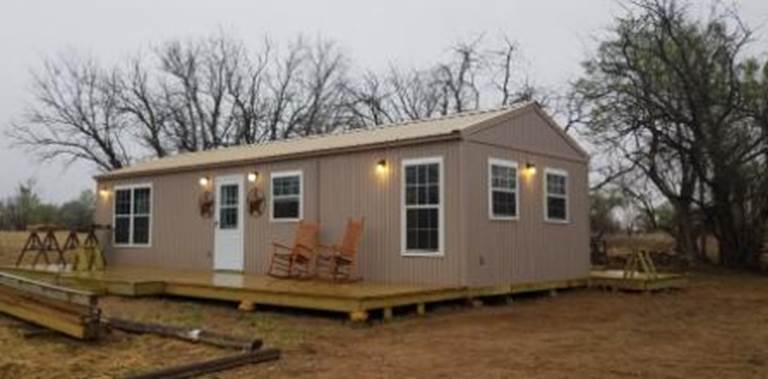
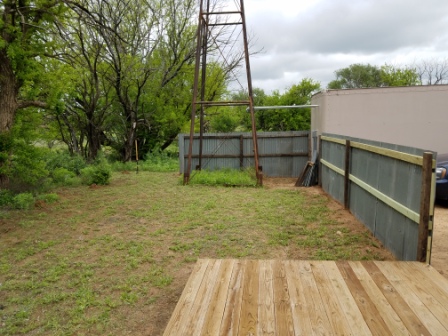
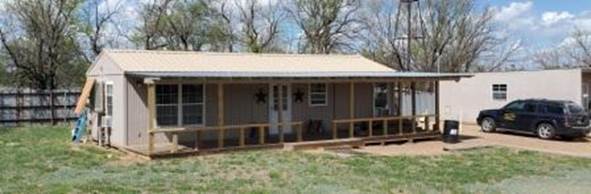
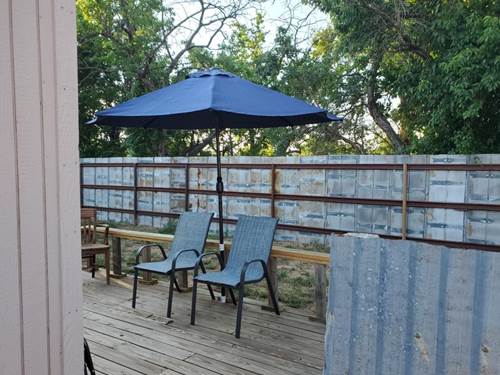
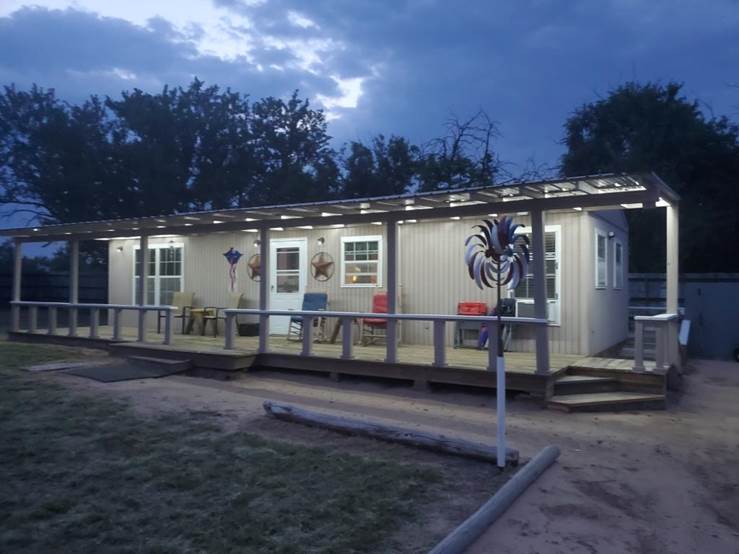
And we have
a front porch now!
It began
with a 3-pahse project, so I could eat that elephant one bite at a time.
That meant starting with the middle section

And then
Adding the East End
(That is
the materials for the West section, stacked on top)
And finally
the West End

To Complete the 8-1/2’ by 40’ front porch.
Ready for
the front supports and the roof to come next!
But at
least I can now work on the porch and get the saw horses out of the Living
Room.
As an homage to my Home State of Texas, I have joined the
‘cult’ of having those COOL STARS on my place…
One to
welcome in the drive,
I am going
to end up moving this big Star in the near future, since it’s now obscured from
view by the Solar Array.
And a Pair
on the Front Porch.
You also see
the front storm door is complete, as well as the replacement globes on the
light fixtures.
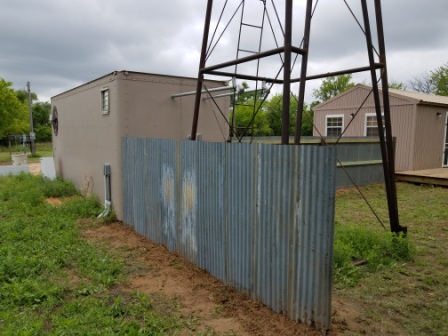
I’m also a
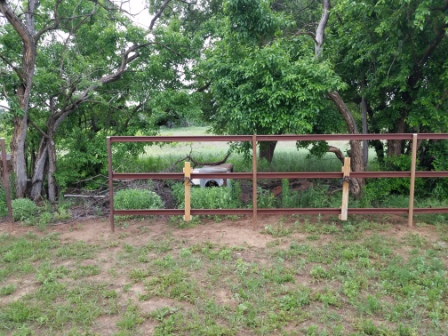
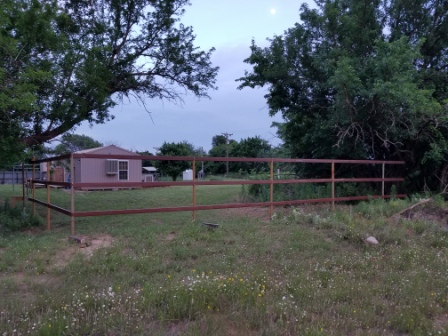
BIG fan of the “good fences make good neighbors” philosophy, so to that end
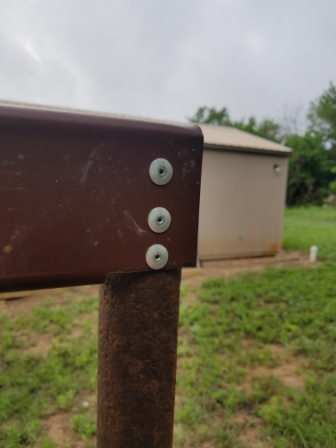
I’ve been collecting parts for a fence.

I have over
300 panels of sheet metal, and enough pipe for all of
the posts.
More on
that project, soon. I have started it,
but have not posted pix just yet.
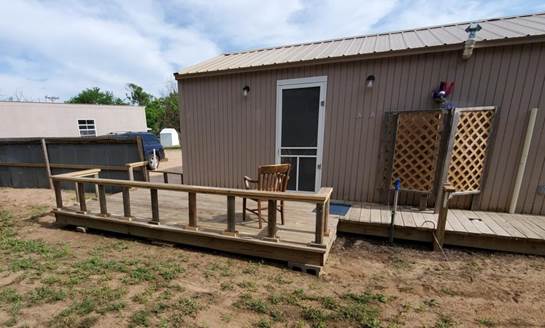
I also have
a back porch – just to have a place to get in and out comfortably – and as a
bonus that back is in the shade most of the day.
Starting
with a base frame

And Installing the top planks

And
finishing out…
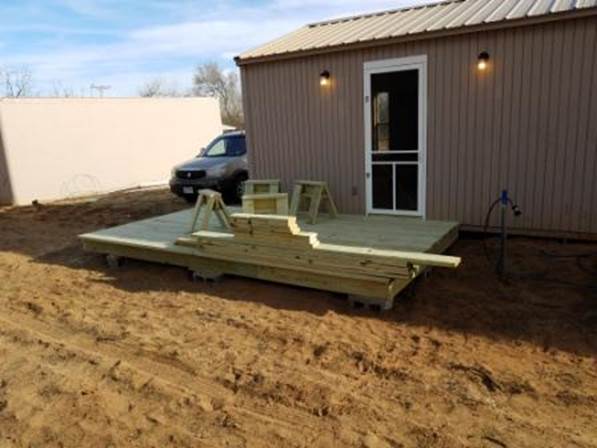
I even used
some of the scraps to make “stools”
They are
really short saw-horses but are seat height as well.. cool multi-functional!
If you go
to the sections below, in 2021 this all got expanded as the “Porch Project” got
rolling!
Then the
FENCE PROJECT got rolling
Starting
next to the shop and driveway
And playing
off of that success, began the North and West fences

BTW, I do
not weld, so all of this is put together with….
Pop Rivets!
Once a bit of
the post and rail was up, the panels started being installed.
Saved the
EASY for the LAST, huh?
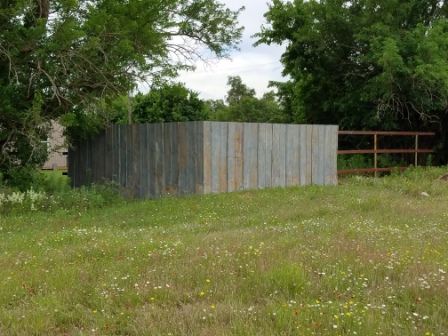
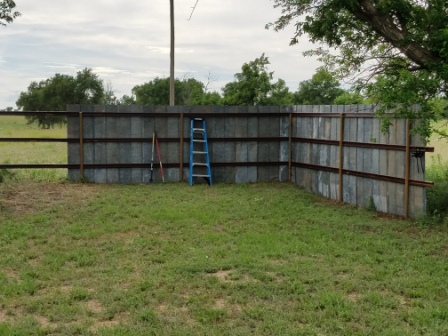

I now have
260 linear feet of the fence done, which is about halfway.
Materials
on hand, waiting on the energy and time now.
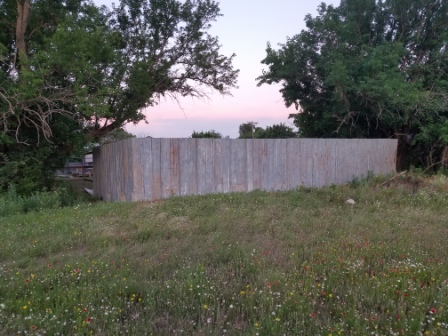
2021
Note: The fence remains in this state,
as I am in the process of negotiating to purchase the next 2 lots on my block
which adjoin this section of my property.
My delay on the fence has been fortuitous in that I’ll not have to re-design
my plan to encompass those lots on the south.
While at the time of this writing the deal was only a verbal agreement,
I have full anticipation of adding those 2 lots to my fence compound plan by
the end of the year.
Back to The Project Section List
Back to TOP
The Semi-Finished View – 2019
We were
obviously working toward having a live-able home, more than finding a place of
total completion. Any home owner knows
that, unless you custom design and have a home built, it will never be
“complete” once you move in and find something you want different. The same is true of this project, as I have
had literally no more than a few pages of scribbles as a “plan” for how most of
this would go I’m not saying I’m a building genius at all – but that I am
pretty flexible with how this house turned out, and made lots of changes on the
fly in the process.
Also, life
tends to get in the way of lots of our plans.
As noted in the Project Timeline, my precious sister-in-law was
diagnosed with cancer and died as we were just getting into the midst of this
project. I was living with my brother
and her, and he has been a great hand and inspiration to me from the
beginning. They worked together in the
mid 90’s and built their home (in which I was living) and I always knew that
there was an end in sight for this and I’d have a place of my own soon.
The Project
timeline above kind of stalled in the summer of 2018, as I got busy at work;
but I did manage to make things come together for a comfortable living to be
available in the house by the fall of the year.
No, it’s not “finished” by any means – but the inside is about 95%
complete and certainly where I can live and get through the cold weather season
and then pick up on the rest of that huge porch project, as well as some indoor
paint and finish work that just requires warmer weather.
The outside
of the house and the compound pretty much is as shown above, but I’ve been
living in the house full time since November of 2018. So to show how that day
to day life goes for me, here is a “walk through” of the house as I’m living in
it during the Winter of 2018-2019.
If you
reference the drawing of the house at the very top, it got built very much like
we had planned. The only major change is
the location of the fireplace and the “desk-dining room table” have swapped places.
Coming in
the front door, the fireplace is the center of the North Wall. That is a reproduction print that was a 50th
wedding anniversary gift to my maternal grandparents back in the early 70’s;
I’ve had it since my grandfather died in 1987 and am proud to have it a center
piece in my home.

The mantle is a piece of 90 year old cedar barn wood, it was the center beam in a barn torn down in Wheeler county. The curio cabinet is the sum total of my lifetime of memorabilia; as you see the top 2 shelves are Star Trek related <g>. The propane heater will run you out in a hurry if turned on high; certainly easy to keep the house warm.
This is opposite the large work area for my bride and I – she has the left 2/3 and the right 1/3 is mine <g>. But it is very functional for what makes our paying occupations.
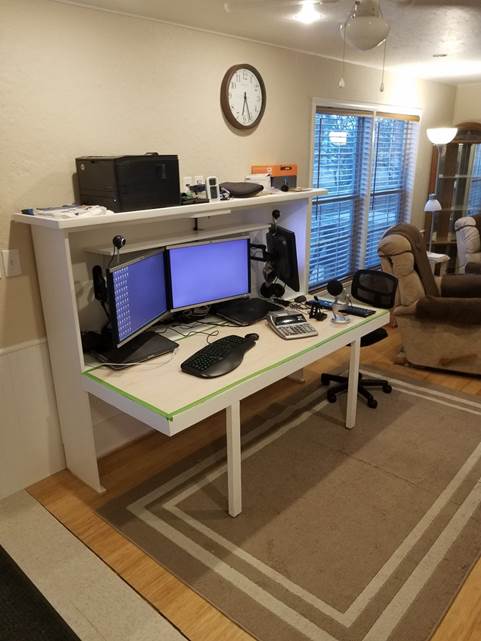
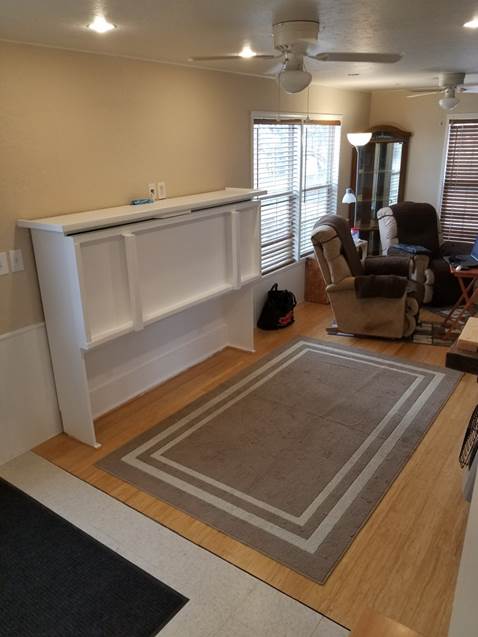
And it folds up like this when we want to set up a dining room table – like that’ on my list to entertain anyone in the house, that’s what that huge outside deck is for, after all!
The around to the west is the rest of the living room area
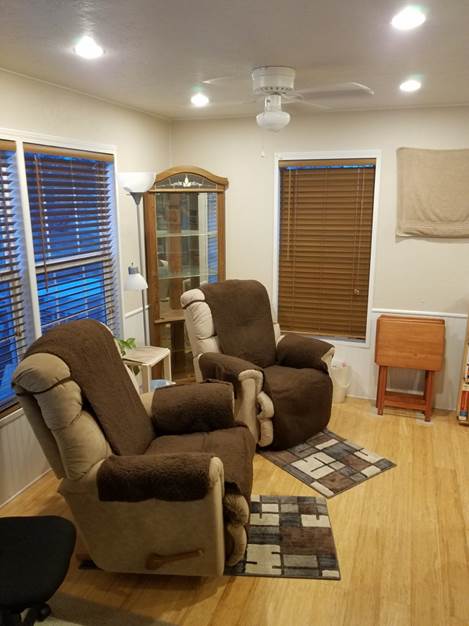
The corner curio has yet to be unpacked, but it has lights in the top and bottom which are plugged in.
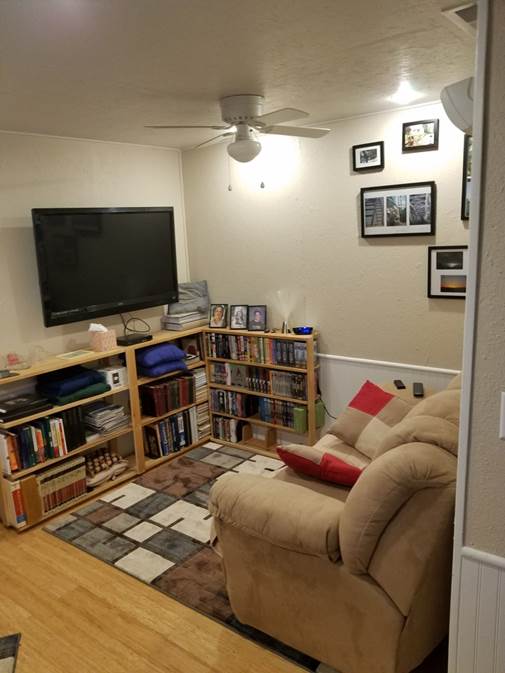
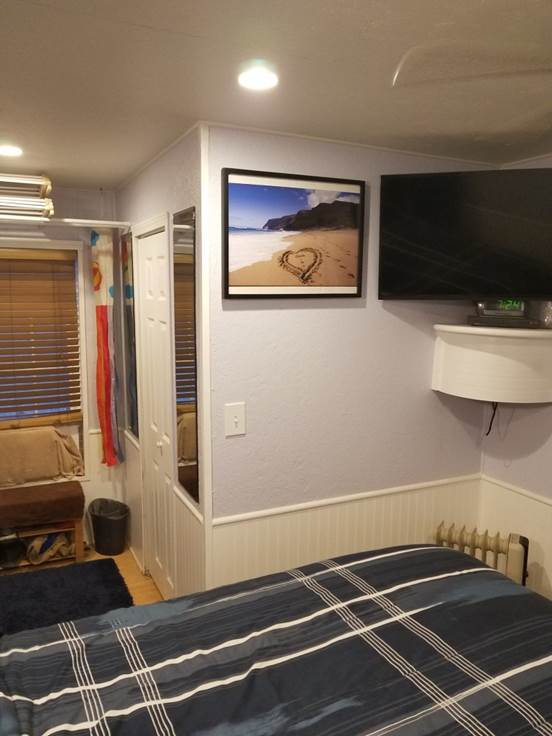
And around the corner is our Home Theater area.

Facing the book shelves and TV on the wall.
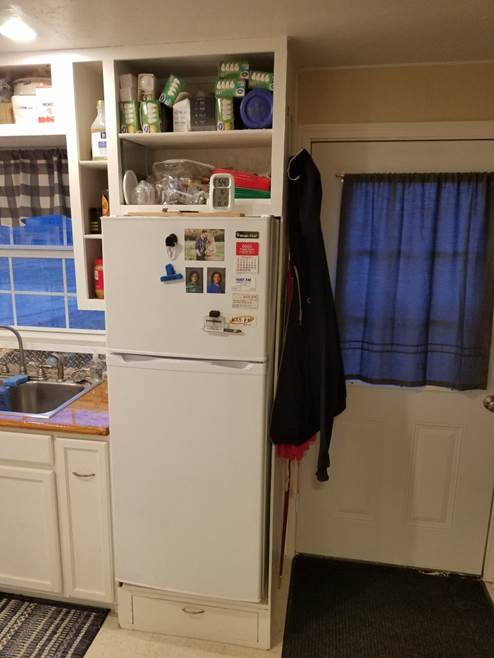
Then back to the other end to the kitchen, which is complete save the finished cabinet doors.
South
East
North

I have the doors cut and ready to assemble and finish with newly routed frames, but that’s a warm weather project, even in the shop.
And since the shop has not been cleaned out from the rest of the building project, and since I’ve already gotten pretty accustomed to not having cabinet doors, that’s really been a back-burner project for me.
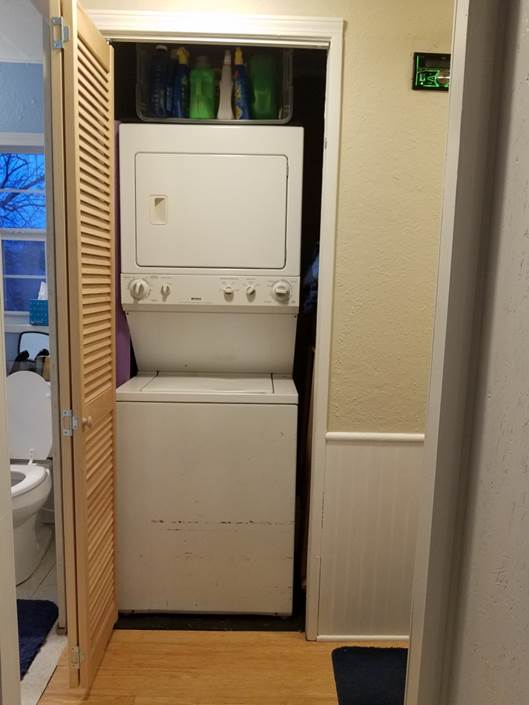
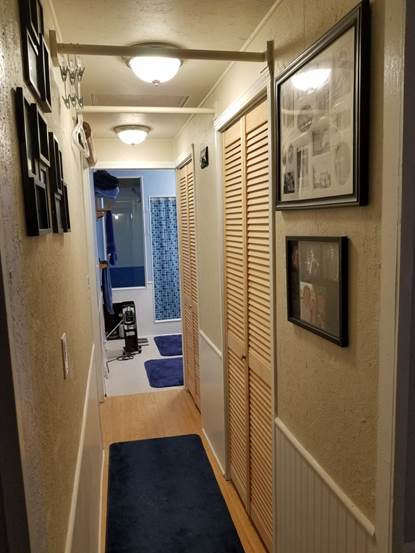
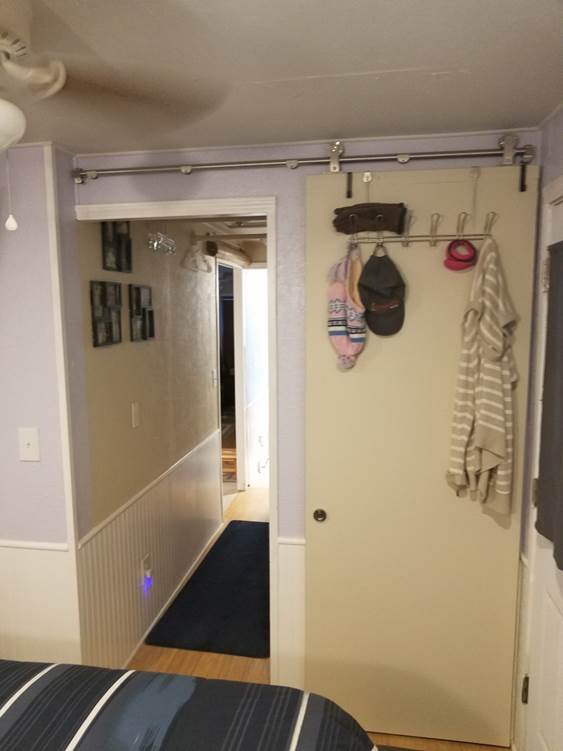
Through the door to the hallway, the stacked washer-dryer is in its closet

And the hall door next to the east is the utility closet
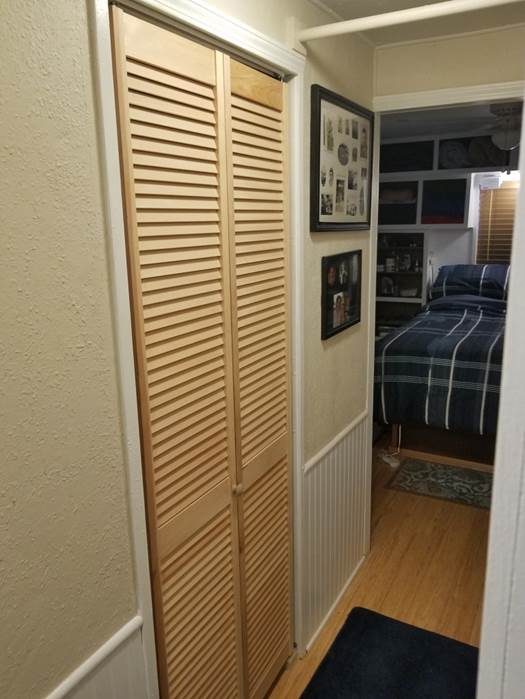
which has now doubled as a very large coat closet

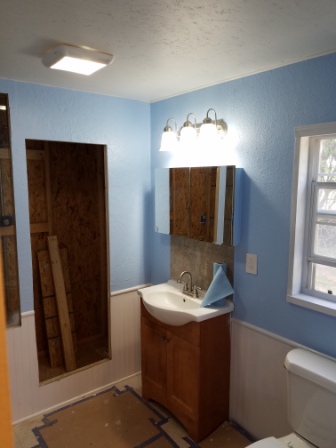
Then west into the bathroom

North view
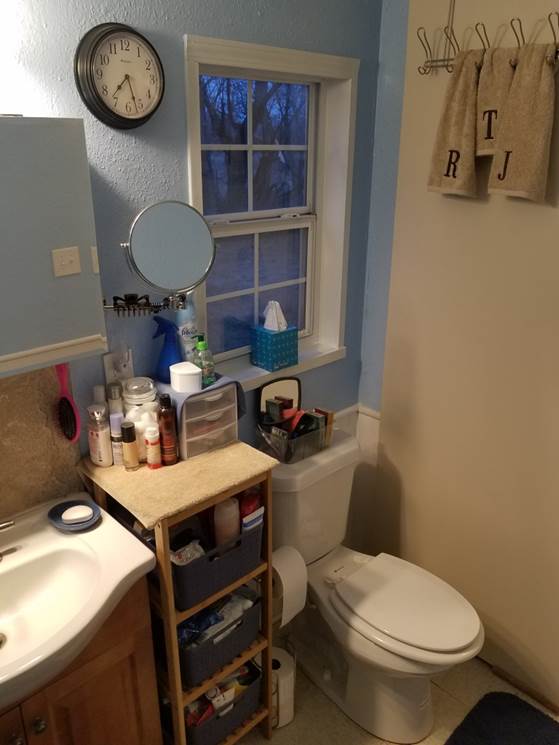
West View
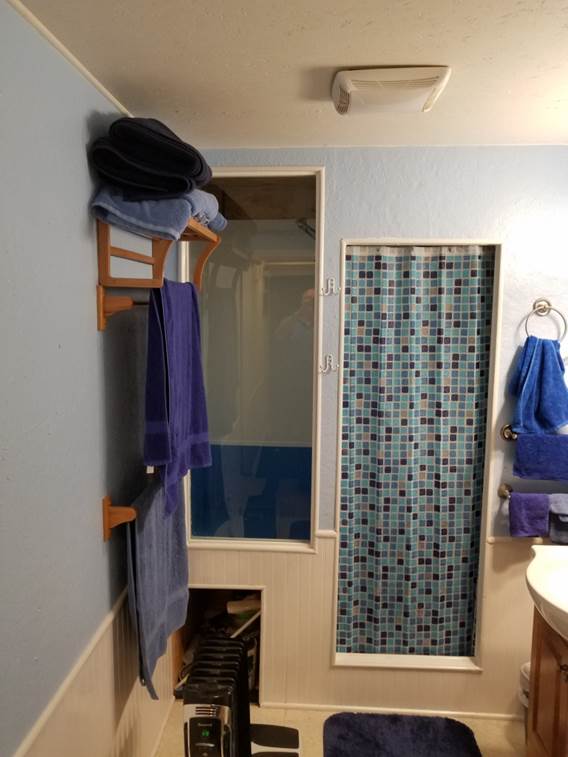
With the walk-in shower

Back in the hallway, I have piped audio from this unit in the wall there
To the kitchen above the pantry

And to the bedroom above the bed
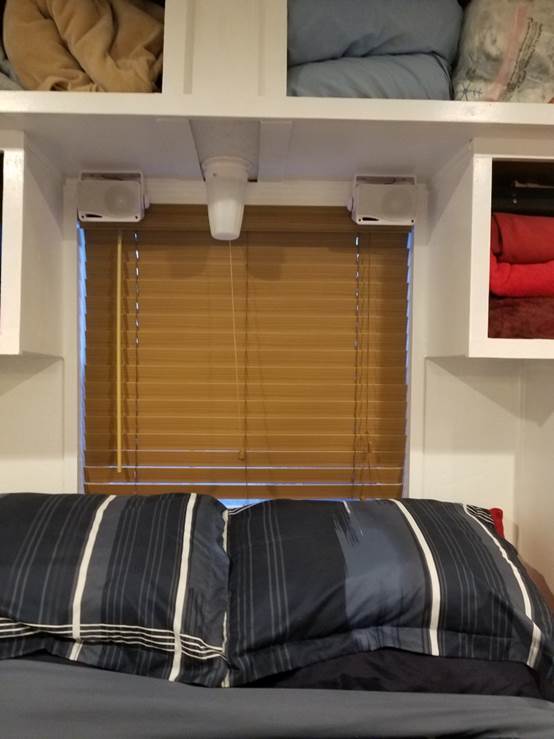
Where we have “sounds” available from AM FM Bluetooth or MP3 player 24/7. Yes, it’s always on, too. <g>
I have also expanded the sounds to the outside – there are 4 speakers under the front porch, 2 on the back porch and will have 2 on the West porch.
The other view of the hallway from the bedroom shows some of the pictures on the wall, as well as the drying rods in the ceiling for aid in laundry work.
That full view of the bed surround
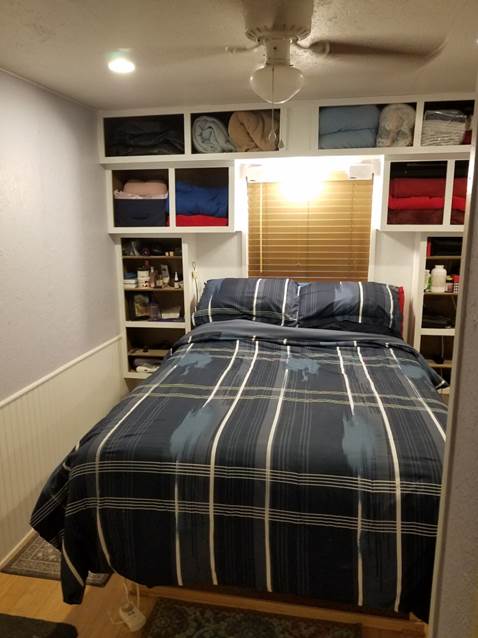
Which has tons of storage in and under. Yes, the cabinet doors are in that kitchen door project, too.
The view to the south, the storage above the south window for our other indoor drying racks

And the walk-in closet to the right. Double dressing mirrors on each side of the closet door.
Lots of shelving in the closet
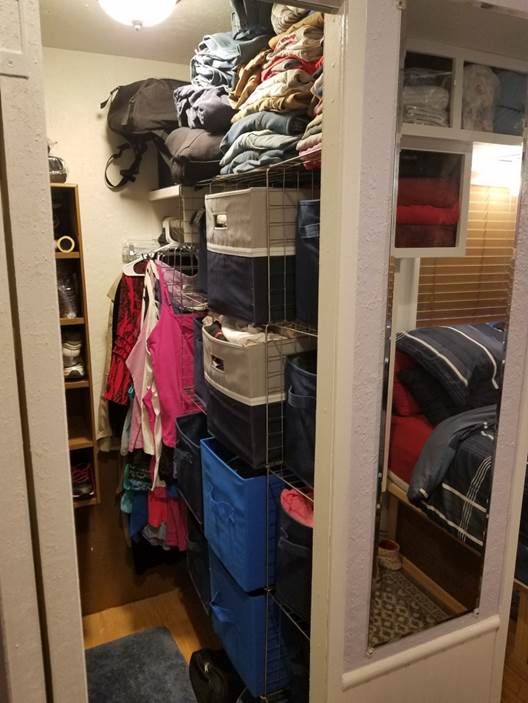
As well as clothes racks and shoe storage.

The window AC is covered outside and in for the winter, and the storage benches are really handy.

Looking back to the west, you see the sliding bedroom door which is a twin to the bathroom one at the other end of the hallway.
AND THAT IS WHERE WE ARE LIVING NOW.
I will post updates on the project as the weather warms, and as details get finished, but that may be a while!
**************
NOTE **************
The Project once again took a pause for nearly a year at this point; I
had been living here in the house for just about 4 months when my brother Glen
(who was still very helpful in the project, but not involved as much once I got
down to these finish details) ended up in Amarillo in Hospital with Kidney failure. He made a truly miraculous recover from that,
but by the summer of and fall of 2019 was sick again, this time with AML –
Acute Myeloid Leukemia. After nearly 2
years of going through 4 rounds of treatment, the Cancer metastasized and went
to his brain, where it rapidly shut down all of his systems and he died on my
birthday, October 15, 2020. During this
time, I and his new wife (Cheryl) spent a *lot* of time caring for Glen, before
God graciously received him into His care.
So in the Spring of 2021, I intend to get back
to focusing on this house project, specifically that fence project which Glen
had again been very helpful in getting me closer to completion before his
illness. After the insane world of the
year of 2020, I’ve wisely given up the idea of setting new goals. LOL
Even in his sickness, Glen always loved to get updates on my projects at
the house, and was always an encouragement on my work there. I especially miss him more than words can
say, but know he, too, is smiling down
on my progress and is no longer in pain.
********************************
Back to TOP
Most Recent Update
The 2021 Projects
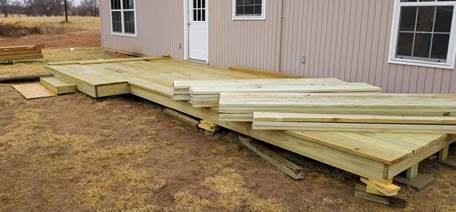
As we all moved past the loss of my brother Glen, I entered he phase of my work where I had time to take on some of the house projects again. My first desire in the Spring of 2021 was to have a completed front porch by summer, to enjoy those sunsets in the West in comfort and style.
Not having ever built a porch before, my brother John came to visit and jotted down some directions on a napkin at Mel’s diner about how easy it was to build a porch… duh. <g>. And so taking his inspiration, I dove into uncharted territory again and actually built the porch in a couple of weekends.
It started with the ledger boards against the house, then the posts went up and the front header all the way across
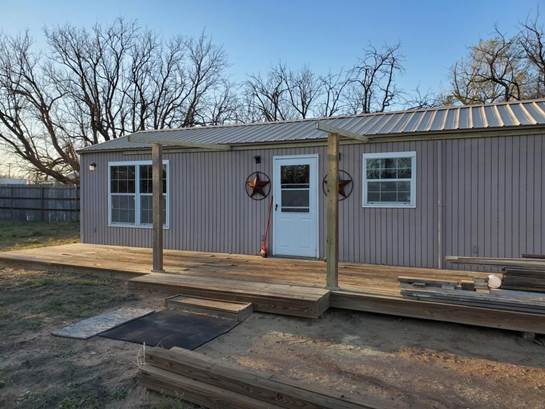
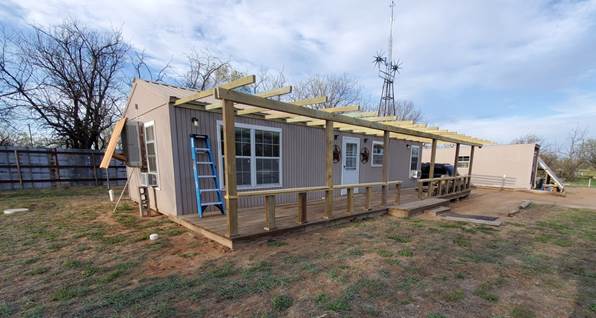
Then the railing filled in and a step built on the east end.
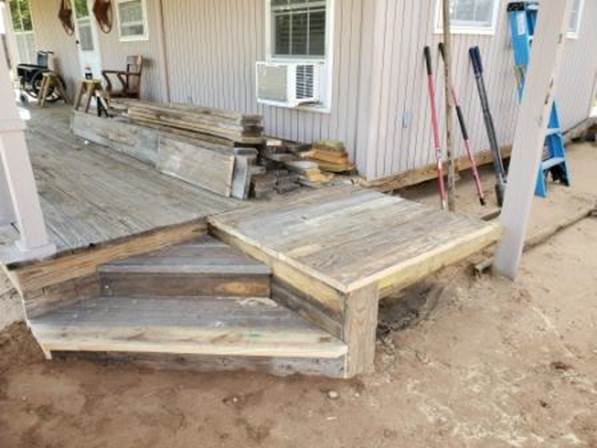
That triangle corner step is a theme I intend to use all the way around the house.. we’ll see how it works out!
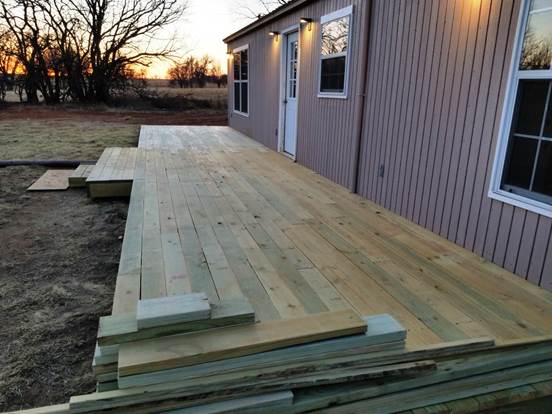
Then some fir strips and paint to match the house,
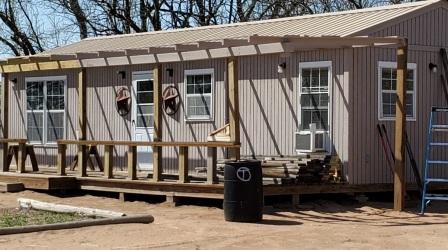
And the steel went up really fast.
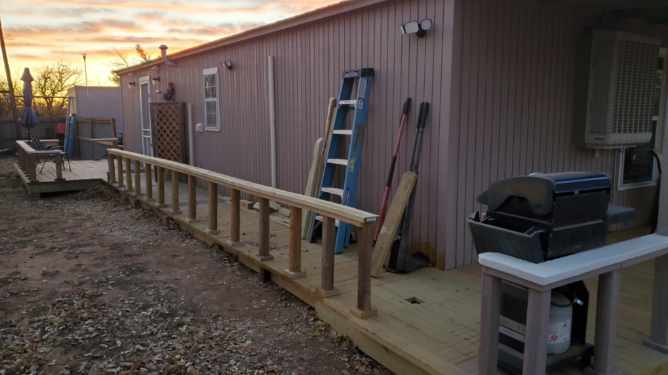
Which led to building the double ramp

And completing the back porch to connect
Not a bad little back porch now.
I just recently completed the rest of the North walk and all of the West porch, which will be the completion of the porch all the way around the house;

The North side is in the shade year round so that’s not a high priority for any covering right now.
However the weather finally turned FALL and then WINTER and it’s not been warm enough to paint
I lastly added LED lighting under it for a calm effect, and it has really been a dream come true in so many ways.
The Future
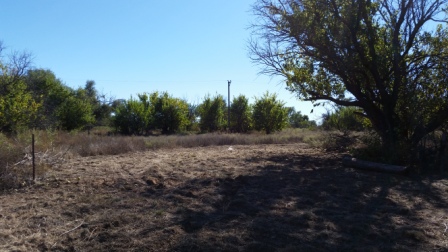
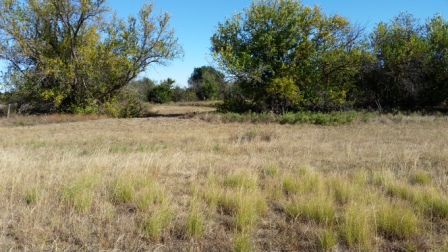
We have
obviously been focusing on “getting there” with the house and utilities; most
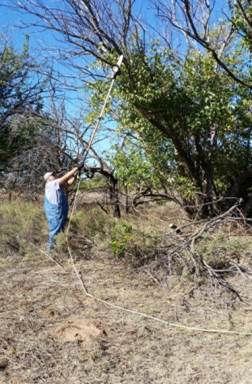
of the rest of the property is pretty much untouched. I have had to trim trees – Dad would never allow
a tree on the property one could not walk under and not hit your head – and
pick up large trash (refrigerator, washing machine, etc. which had been dumped
through the years) but apart from that there is still plenty to clean up on the
place. I have no plans for much of a
‘yard’ and certainly not one which needs to be mowed on a regular basis. Concrete and rocks will be my friend… <
LOL > After
a couple of years living here, I have come to see the need for a couple of
expansions to the compound.
Also, I’ve
come to realize the value of a guest accommodation; which has always been in
the long term plans, but now may get advanced as well so we can accommodate
visitors to the Circle-T Ranch in some level of comfort. Again, I’ve a great deal of plans already
made for that, but will wait to post them online until I have them all worked
out.